Thursday, March 28, 2019

Easy Cut Flowers For Drying

by Yvette Henson

Over the years, when I’ve purchased cut flowers at the Farmers Market, I have tended to favor the ones that dry easily.  They last a long time in a vase and then I like to use them again by making wreaths or adding them to potpourri.  Following are 5 easy-to-grow-from-seed flowers that you can plant in containers or in borders.  These can all be used as cut flowers and for drying.  


Sweet Annie, Artemisia annua
Sweet Annie photo credit Johnnyseeds.com

Once established in your garden, Sweet Annie is a politely re-seeding cool-season annual with a wonderful sweet and tangy fragrance to the foliage and flowers.  You can sew them outdoors a few weeks before the last frost in the spring but be patient—they can take a little while to germinate.  Sweet Annie is most commonly grown for the foliage to use as a base for wreaths.  It can grow quite tall (up to 6’ tall and 3’ wide) but it stays around 3’ in my cooler, higher elevation garden.  It will be shorter grown from transplants than from seed.  It needs sun and well-drained soil.  It should be harvested when the small yellow flowers just begin to open.  If you wait too long, they will shatter and make a mess. 

Globe amaranth, Gomphrena globosa 
Orange globe amaranth photo credit mountainlilyfarm.com

Globe amaranth is the only warm season annual that I included in this blog.  It is an old fashioned flower that makes a good bedding plant, cut flower and dried flower.  The most common colors are a range of pinks and purples but they come in whites, oranges and reds.  Given sunny and warm conditions, they grow quickly to 1-3’, depending on the variety.  They need medium to dry well-drained soil.  If they are planted close together, they may grow longer stems.  They dry best hung upside down in a shady, well-ventilated location.  If dried upright in a vase, the flower stem may bend near the head. 

Love-in-a-mist, Nigela damascena
Love-in-a-mist photo credit monicelloshop.org

Love-in-a-mist is a cool-season annual with white, blue and pink flowers.  It grows 1.5 -2’ tall and wide.  It likes well-drained, medium-moist soil and full sun.  The flowers, feathery foliage and seed pods make great cut flowers. The bristly, beige, inflated seed heads dry better than the flowers but the flowers can be dried too.  Their color will fade slightly when dry.

Painted sage, Salvia viridis (syn. Salvia horminum)
Painted sage photo credit Trade Winds Fruit

Painted sage or annual clary sage is a hardy annual that prefers well-drained soil and full sun to part shade.  It grows upright to 2’x1’.  The showy white, pink or purple parts of the inflorescence are actually colored bracts that hold long after the tiny flowers are spent.  It is a lovely cut flower and dries well. 

Bells of Ireland, Molucella laevis 
Bells of Ireland photo credit seedsavers.org

Bells of Ireland is a half-hardy annual that grows better from seed than transplants.  Plant seed early in the spring when the ground is still cool.  It grows upright 2-3’x1’ wide. It prefers moist, humus-rich, well-drained soil and full sun to part shade.  The showy parts of the inflorescence are the green calyxes.  They will retain their color when drying if placed upright in a vase filled with only 1 inch or so of water.  This allows a slow dry down as the water is used up.  Also, when you cut the stem, before placing it in the water, singe it with a match flame to prevent the sticky sap from blocking its ability to take up water.

After writing this blog, I want to grow every one of these this summer!  Most of the seeds can be found wherever seeds are sold. 

Monday, March 25, 2019

Top houseplant watering myths


By Irene Shonle, Director CSU Extension in Gilpin County


I live in the mountains, and both March and April can be frustrating for a gardener’s soul. I see reports of crocuses and snowdrops down below, but we are still white and frozen up here. This is when I turn to houseplants to save my sanity. 


Late winter houseplants at my house
Houseplants can be such a boon for the winter-weary, but they can also pose frustration for those who have trouble keeping them going.  In this post, I am going to bust the top three myths that lead to poor watering habits (probably the number one killer of plants).

The most pervasive myth is that you should always add a layer of gravel or other coarse material at the bottom of pots to improve drainage.  This is an extremely common recommendation, and while it seems plausible, it actually does the exact opposite! Soil scientists have known for at least the past hundred years that water does not move easily from layers of finer textured materials to layers of more coarse textured. Instead, the water will not move from the finer material to the coarser until the finer soil is completely saturated. This is called a perched water table. Bottom line- your entire pot should have the same high-quality soil in it, and nothing else. If you need to improve drainage, mix perlite in the soil throughout the pot. Also, make sure there is a drainage hole in the bottom of the pot, though, or the lack of drainage could cause root rot.
 
 In the cup on the left which is filled entirely with potting soil, water sits at the base of the container while, in the cup on the right which was filled halfway with gravel, water sits above the gravel - From The Garden Professors Facebook page
The second most common myth is that you should always water on a schedule.  This is popular because it’s easy, but it does serve your plants well. For one thing, plants often need less water in the cooler, darker days of winter – perhaps a plant that needs watering every couple of days in the summer might go a week in the winter without needing it. For another thing, if you have many houseplants, they may not all need the same schedule of watering. Some might need a drink every couple of days while others would prefer not to be watered more than every couple of weeks. My orchid cactus will only come into bloom in the early spring if I don’t water it at all starting in November! There are other plants that respond to dry periods with a flush of blooms, and still others that won’t flower unless kept consistently moist. Get to know the needs of each plant, and cater to those. Don’t water any plant if the soil is already quite moist – poke your finger in the soil to see if it needs water or not.

The final myth of today is that droopy plants always mean it’s time to water. If the finger test mentioned above indicates a very dry soil, then yes, water quickly before you lose the plant.  But double check before you water – plants that are developing root rot due to too much water will also droop, and water is the last thing they need!

Wednesday, March 20, 2019

Spring into gardening by getting started on Pollinator Habitat!


Posted By Abi Saeed, Garfield County Extension Agent: Agriculture, Horticulture, and Natural Resources

Just like us, pollinators need two main things in order to survive: food (floral resources) and shelter (nesting materials and habitat).

Solitary Bee on a Black-Eyed Susan (Photo: Abi Saeed)

Pollinators (like bees, butterflies, birds, bats, etc.) have a huge impact on us! They play a role in our agriculture, economy, wildlife, and plant diversity. Bees are the most important of all these pollinators because of a key part of their anatomy: the fuzziness. Bees are covered with branched hairs on various parts of their body. These hairs allow them to be the incredible pollen-carrying critters that we know and love!
Colorado is home to 946 different bee species. A majority of these bee species rely on floral resources in the environment. Most of these species are also solitary, and live in individual nests, as opposed to their social counterparts: honey bees. This means that this group of wild bees, all need a place to build their nest (either in the ground, or in cavities).
Due to increased development, these nesting resources are fewer and farther in between.

Although it is always a good idea to incorporate pollinator-friendly plants, encouraging pollinators in your landscape involves more than just flowers, as habitat is equally important. This is especially critical for wild bees that nest in the ground and in existing cavities.

Here’s how to add ‘Bee Habitat’ to your gardens:
Ground Nesting Bees:
Ground Nesting Bee emerging from her nest. (Photo: Abi Saeed)
70% of bees nest in the ground. By leaving some bare patches of undisturbed soil (it does not need to be large area, and can be tucked out of the way) you are creating safe ground nesting bee habitat available to those extremely important native pollinators. Although mulch is a useful tool for your garden beds, it creates additional obstacles for a ground nesting bee to get to some actual ground in which she can make a nest. You can still use mulch in your gardens, but leave some areas uncovered to allow direct soil access for bees.

Cavity Nesting Bees:
A 'Bee Hotel' showcasing the variety of nest materials that
can be utilized by cavity nesting bees in the landscape.
These include: Bamboo reeds, cardboard and paper tubes,
drilled blocks and bundles of twigs.
(Photo: Abi Saeed)
Cavity nesting bees (making up 30% of bee species) can be just as simple to accommodate! Encourage them in your gardens by creating ‘Bee Houses’ made from wood, reeds, cardboard tubes, and a container to put them all in. These can be as simple or as complicated as you would like, but make sure that you follow some of these guidelines if you are building your own ‘bee hotels’. 
Don't feel inspired to build your own? You can always purchase solitary bee nesting boxes, or bee hotels from a variety of suppliers. Just make sure that the bee hotels fit the specifications needed to host happy and healthy bees. Some of the most important criteria to consider: the depth of the tubes/reeds (make sure they are 4-8 inches deep) and the width/diameter of the tubes (varying in size between 1/8 - 3/8 inches will attract a diversity of Mason and Leafcutter Bee species.
Placement: opt for a sturdy placement on a wall or shed, in an out-of-the-way area. Make sure that the structure is placed 3-5 feet above the ground, and away from bird feeders and water spouts that will drain excess moisture. South and/or South-East facing is best, where bees have access to early morning sun and warmth throughout the spring season.
And, as with any bee habitat: make sure that there are plenty of flowering plants nearby for the bees to access nectar and pollen!

Additional Resources:

http://extension.colostate.edu/docs/pubs/insect/05616.pdf
http://extension.colostate.edu/docs/pubs/insect/05615.pdf
https://pollinators.msu.edu/publications/building-and-managing-bee-hotels-for-wild-bees/
http://msue.anr.msu.edu/uploads/files/Pollinator_habitat.pdf

Monday, March 18, 2019

Organically Controlling Weeds with Taproots on a Small Plot


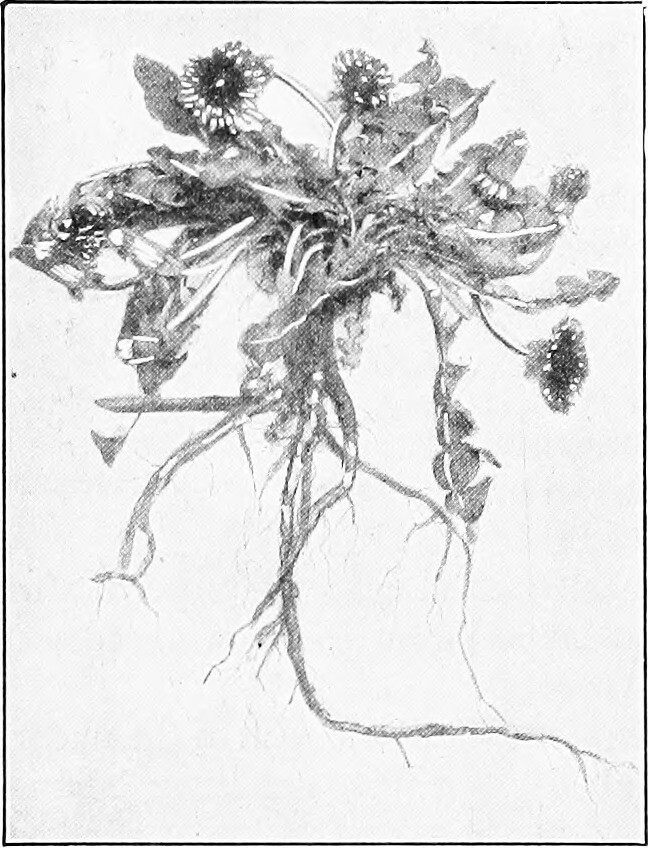
Image result for dandelion taproot


Posted by: Kara Harders, Small Acreage Management Specialist for the Peaks and Plains Region - CSU Extension/NRCS

Weed control is a constant battle but some are easier (in theory) than others. Some of the more difficult weeds to control are those which have a taproot. These weeds readily come back after being mowed, pulled, or eaten because they have enough nutrients stored in their roots to regenerate! There are several tools to consider for controlling weeds organically. No matter what tools are used, it is important to recognize weeds as a symptom of land management. You may control the weeds one season, but if the ground is left uncovered, over grazed, or reintroduced to weeds, your problems will likely return quickly.

Obviously, life would be much easier if the weeds weren’t there to start with. When it comes to organically controlling weeds, proactive strategies will save you far more time and labor than reacting to the weeds once they are present and established. Proactive approaches to weed management include mulching, crop rotations, or cover cropping. These methods all make it difficult for plants to get enough sunlight to grow or become comfortable in their surroundings. They also increase soil health, decrease erosion, and even help with pest problems. Consider adding these methods to your land to help prevent the problem!

If you only have a few of the pesky plants, using a spade to dig out the whole root can be a reasonable approach, especially if the ground is relatively soft. Getting the plants out before they go to seed helps prevent new ones from establishing too. Hand pulling is generally not effective on plants with taproots since they tend to break off leaving the roots safely underground ready to re-grow. This is why goats are less effective on taproot type weeds. If you want to use animals to control weeds, pigs are a more effective choice. Since they plow and root up the soil, they do a better job killing the roots of these weeds.

Occultation is a less known method which helps germinate and kill weeds early in the season. By anchoring heavy tarps (UV-stabilized silage tarps work well) or dark landscape fabric over land you wish to farm, you can increase the temperature of the soil earlier in the spring and cause seeds to germinate earlier. When the plants under the tarp sprout, they have no sunlight and die off. After three to four weeks the weeds should have grown and died, leaving behind a bed of soil ready for planting. If well cared for, the tarps or fabric can be reused many times! A barrier to this method is the tarps can be too heavy, difficult to move, or hard to store depending on your situation.

Flame weeding is another method that can kill weeds from a seed bed after they have germinated. Flame weeding works by burning young plants when their root systems may not be established enough to allow them to recover. It also can knock back a weed population allowing desirable plants seeded shortly after to better compete for sunlight, moisture, and nutrients.

Herbicides can also be a choice in organic agriculture (although are often less effective on established weeds with taproots). In order for an herbicide to be approved for organic use, the active ingredients need to be approved for use by the National Organic Program (NOP). The timing of the application is highly important and multiple applications are often required. One of the more frustrating aspects of organic herbicides is they have broad spectrum effects, essentially, they kill everything they touch. And remember, always read and follow directions on herbicide labels!

Here are some of the more common active ingredients to look for in organic herbicides:

* Vinegar (Acetic Acid) – 5%-30% acetic acid as post-emergent herbicide. It is a post-emergent herbicide used to burn off top growth. Acetic acid is most effective on small annual weeds and less effective on grasses than it is on broadleaf weeds. The more potent horticultural vinegars (above 11%) can cause burns on human skin when exposed to it.

* Herbicidal soaps – fast-acting, broad spectrum herbicides made from fatty acids. They are used as post-emergent and are most effective on annual broadleaf weeds and grasses.

* Clove oil – an active ingredient in post-emergent, non-selective organic herbicides. Research has shown that is can be as effective as acetic acid in controlling broadleaf weeds but at a lower application rate.

* Chelated Iron – These iron products are similar to the iron you would use to fertilize a lawn. However, the iron is bound to a chelating agent making it more available for plant uptake. Broadleaf plants absorb the iron more easily and when the high levels are oxidized it causes the broadleaf weeds to dry up and die quickly. Multiple applications are needed throughout the year and is most effective in lawns. See this document for more information. https://extension.umd.edu/sites/extension.umd.edu/files/_docs/programs/ipmnet/Iron%20Herbicide%20Info-UMD-IPMnet.pdf

If you are looking for more weed management strategies, check out this page. It is a ATTRA publication about proactive and reactive methods which provide an alternative to conventional tillage systems. (https://attra.ncat.org/attra-pub-summaries/?pub=479)

Thursday, March 14, 2019

Culinary Herbs for the Spring Garden

Posted by Mark J. Platten, Teller County Extension Director


Herbs are some of my favorite plants to grow. I just love being able to cook with them and rub them between my fingers to smell their wonderful aroma. Generally speaking, most herbs love lots of sun and well-drained soils. Aphids and white flies love these plants too, so be sure to keep a good watch and don’t overwater.

Photo by Markus Spiske on Unsplash
Basil (Ocimum basilicum) ~ Don’t let basil go to flower, pinch it back and you will promote a thicker fuller plant. If you let it go to flower, it will stop or slow down the leaf production. Basil requires moist but well drained soil, and requires 5 hours of full sun. A nice compost tea will help the plant to grow lush and full. Basil is very tender, so keep it sheltered when chilly weather is imminent.

Peppermint (Mentha piperita) ~ Peppermint can be invasive, to keep it under control keep it in a container or in a separate box. Soil can be moist, but never soggy and several hours of full sun per day are needed. Pep­permint comes in many varieties, so explore multiple species and discover which you enjoy the most!

Rosemary (Rosmarinus officinalis) ~ Rosemary can produce for quite some time but it can also become woody. Cut it back regularly and remember when cooking, a little goes a long way. Seed germination is low so starter plants are a great way to go. I always keep my rosemary in pots and overwinter them indoors. Rosemary loves full sun and slightly damp soil. Allow it to dry out completely between watering.

Chives (Allium schoenoprasum) ~ Seeds may be started indoors six (6) weeks before planting outdoors. Chives prefer full sun and minimal water. Onion chives have purple flowers, while white flowers sprout from garlic chives. Chives will self-sow and over-winter in most parts of the state.

Thyme (Thymus vulgaris) ~ Thyme requires full sun and loves well-drained, dry soil. Pinch back flowers (deadheading) after flow­ering for a bushy plant. Seeds are slow to germinate. Some varieties are deer-resistant and will overwinter in much of the state.

Photo by Calum Lewis on Unsplash

Oregano (Lippia graveolens) ~ Harvest oregano when the plant is at least 5- 6 inches tall. This herb has a more robust flavor if you pinch back leaves before flowering occurs, which happens after about five or six weeks. Aggres­sively pinching back leaves from the top encourages fuller, bushier plants.

Sage (Salvia officinalis) ~ Seeds are slow to germinate. Sage requires 4-5 hours of full sun and well-drained soil. When the plant becomes overgrown or root bound, you can divide it. They are very tender so keep them covered when frost is likely.

Cilantro (Corlandrum sativum) ~ Cilantro is one of my favorite plants for my windowsill in the winter months. The aphids love it too, so be sure to give it a good spray of water every week. It loves the full sun of a southern facing window. Harvest cilantro regularly to keep the plant producing.

Lavender (Lavandula angustifolia) ~ Lavender absolutely needs well-drained, dry, sandy soil. Clay soil will smother the roots and it will rot. Lavender requires 6-8 hours of full sun. It does not overwinter well in the mountainous regions of the state, although if you have an optimal microclimate and you mulch this plant, it may have a fighting chance. If you really love this plant, keep it in a pot and bring it in over the winter months. You may need to constantly watch for aphids and spray it with a strong flow of water.

I love to overwinter these herbs in pots and they live on my kitchen table in a warm southern window - they grow just wonderfully and they go back outside in late spring. These are just a few of the basics, try a few and experiment with other varieties - you will be hooked!

 
Photo by Alyson McPhee on Unsplash
Special thanks to the Teller County Master Gardeners and CSU Horticulture for information for this post.

Monday, March 11, 2019

Attracting Birds All Year-Round

Photo Credit: Brandon K. Percival; Northern Cardinal;Audubon112 Annual Christmas Count; Pueblo Reservoir, CO

By Linda Langelo, CSU Horticulture Agent, Golden Plains Area

How do we care for our fine-feathered friends throughout the year? Here are a few suggestions based on a bird's basic needs:

  • Bird need a diversity of food sources
  • Like any wild animal, birds need shelter
  • Birds need nesting sites
  • Birds need plenty of water
In among the trees and shrubs, various birds have different niches at different levels.  Some forage on the ground while others forage and stay among the treetops.


But here is the important thing.  Naturally occurring local plant material is the best for attracting birds. Why? The birds are familiar to the local native plant venue.  Without a good mix of native plants, there really is nothing on the menu.  I compare this to my own dietary restrictions.  I am gluten free.  When I am out traveling and stop to eat at places which are familiar to me that carry gluten free selections on the menu.  Otherwise, I won't be stopping.


Here are a few native shrubs from which to choose:

  1. Serviceberry - Amelanchier alnifolia
  2. Red Twig Dogwood - Cornus sericea
  3. Wax Currant - Ribes cereum
  4. Red Berried Elder - Sambucus racemose
  5. Western Sand Cherry - Prunus besseyi
  6. Woods' Rose - Rosa woodsii
  7. Silver Buffaloberry - Sherpherdia argentea
  8. Sumac - variety of species
Photo Credit: Shelley Dahme; Eastern Towhee; 112 Annual Christmas Bird Count; Longmont, CO

 For a more comprehensive listing of native shrubs in Colorado, here is a good Colorado State University Extension Fact Sheet: 7.422 Native Shrubs for Colorado Landscapes;
https://extension.colostate.edu/docs/pubs/garden/07422.pdf

Providing shelter varies with the species of bird.  According to "Birds and Blooms", Chickadees prefer small trees and shrubs or thickets for shelter while Blue birds prefer being close to open fields. For the various birds that come in your landscape, you can provide bird houses for them in their preferred habitat.  Here is a link to an article from "Birds and Blooms":
http://www.birdsandblooms.com/birding/birding-basics/attracting-nesting-birds-better-birdhouses/

For placing birdhouses in your landscape, pay attention to the different habitats of the variety of birds
that visit.  If it is not the correct location, the birdhouse may remain unused.

Water is the next important thing.  Like all other living beings, birds need water.  They need it 365 and a half days a year.  The trick according to Cornell Lab Ornithology is selecting the right type of birdbath.  It cannot be too deep.  It needs to be somewhat sheltered for protection.  Birdbaths need to be easy to clean.  For more specific details, here is a link to Bird Notes from Sapsucker Woods by Cornell Lab Ornithology:
http://www.birds.cornell.edu/AllAboutBirds/notes/BirdNote09 ProvideWater.pdf


One final and interesting note about birds is the colors which attract different species.  Here is a link to the National Wildlife Federation article: "True Colors: How Birds See the World," by Cynthia Berger (2012).  In short, birds have 4 cone cells in their eyes while we have three. The fourth cone cell is sensitive to seeing UV wavelengths.  Plus, it has been discovered that birds have a colored oil in each cone cell.  Overall, they see what we cannot.  Happy reading!
https://www.nwf.org/Magazines/National-Wildlife/2012/AugSept/Animals/Bird-Vision

Monday, March 4, 2019

The Lesser of Two Weevils

Posted by Jessica Wong, CSU Department of Bioagricultural Sciences and Pest Management


I like weevils. Weevils are funny little beetles with silly looking “snouts” and they have a name begging to be made into puns. It’s too bad that some of them are also annoying pests that chew on the roots and leaves of a variety of garden plants. Perhaps some might even call them weevil (sorry, but you knew it was coming).

Weevil - Amalus scortillum
Weevil. Photo by Stephen Luk, bugguide.net
In Colorado some of the more common root weevils include strawberry root weevil (Otiorhynchus ovatus), rough strawberry root weevil (Otiorhynchus rugostriatus), black vine weevil (Otiorhynchus sulcatus) and lilac root weevil (Otiorhynchus meridionalis). Lilac, privet, peony, euonymus, heuchera, hosta, rose, strawberry, raspberry, white clover, dandelion, dahlia, and mint are few examples of plants that can be fed upon by one or more of these root weevil species.

Image result for lilac root weevil on peonyImage result for lilac root weevil on peony
Lilac root weevil on peony. Photo by Whitney Cranshaw
Root weevil larvae are legless, cream-colored grubs with orange-brown heads that can be found in the soil in winter. Starting around late-winter through early-spring the grubs pupate in the soil before emerging as adults mid- to late-spring. The adults cannot fly, so they will likely feed on the same plant it developed on as a larva. 

Image result for root weevil larvae
Black vine weevil larva. Photo by Peggy Greb, bugwood.org
Grubs feed on roots, which may cause decline or dieback in plants if the feeding is extensive, but this is quite uncommon in landscape plantings. Adults feed on leaves at night and cause leaf notching. It’s likely that a gardener will not notice the damage until the daytime, but just because one sees no weevil does not mean weevil is not there…. Fortunately, adult root weevil damage is typically only aesthetic and the plant will tolerate a bit of herbivory. If you think you need to manage the pest, check out Dr. Whitney Cranshaw’s Root Weevil Fact Sheet for control methods. 

Image result for leaf cutter bee damage
Circular shaped cuts from leafcutter bee. Photo by Whitney Cranshaw
Image result for root weevil damage colorado
Adult root weevil U-shaped feeding damage. Photo by Whitney Cranshaw
Sometimes adult root weevil damage is mistaken for leafcutter bee damage, or vice versa. Leaf notching caused by root weevils tends to be jagged and U-shaped, while leafcutter bee damage is smooth and shaped like a half-moon. If you’re still having a hard time identifying the insect or the damage contact your local Extension office. Weevil help you!