CO-Horts

CO-Horts Blog

Showing posts with label Colorado Master Gardener. Show all posts

Sunday, September 8, 2024

The Magic of Sweet Autumn Clematis

Written by: Ruth Sens, Weld County Master Gardener 

There is a plant that reigns over my Greeley garden this time of year and it is a clematis vine. More specifically, Sweet Autumn clematis vines (Clematis terniflora) faithfully provide wonderful masses of fragrant creamy white blooms the first week of September. This plant absolutely lights up my tired late-summer garden with much needed beauty and fragrance when most everything else has stopped blooming. 
Sweet Autumn clematis produces masses of fragrant white blooms in the early fall (photo by R. Sens).
The early and mid-summer blooming clematis vines with the larger blooms get serious adoration from gardeners. I do have them planted in my garden also but this clematis is my favorite. Reasons to love this vine include the attractive green leaves in summer, the stunning amount of beautiful blooms, the wonderful fragrance, and the fact that it is a fast growing vine.
The fragrant white blooms awaken the late-summer garden (photo by R. Sens).
You can plant it now but spring planting is optimal. Choose a spot where you will be able to see the mass of flowers and enjoy the fragrance in late summer. Although some sources suggest it will bloom well in part shade, Sweet Autumn blooms most prolifically for me when planted in full sun. This clematis likes a location where the roots can be kept cool in the shade of other shorter garden plants. Dig in some compost when planting, mulch, and then keep the soil moist but not water logged. Sweet Autumn clematis may take a few years to become fully established and winter watering is advised.

The fast growth (15-20 feet per year) means it requires a strong trellis and/or support that it can twine on. Feature it in your perennial garden on a strong accent trellis, on an arbor, a pergola, or even along the top of a chain-link fence. Gorgeous! The flowers will turn into fuzzy seed heads that I think look beautiful in the winter landscape.
Sweet Autumn clematis is a vigorous climber, so provide it with support or a structure (photo by R. Sens).
These vines bloom on new growth so can be pruned to produce optimal blooms. They thrive after a heavy pruning in spring, cut down to 12-18 inches when new green shoots start to emerge. This can be a physical workout if the plant has gotten large, but then you can stand back to watch in amazement as it grows and blooms again. Plants established in optimal conditions can live up to 20 years.

Of note, Sweet Autumn is considered invasive in several Eastern states. It is not listed on the Colorado Noxious Weed list. 

This should be an easy decision if you have the right spot and want a gorgeous large vine. Plant and enjoy! Refer to this University of Wisconsin Extension publication for more information. 

Thursday, June 15, 2023

Squash Bugs in the Garden

By David Fuller, Colorado Master Gardener, Tri-River Area

Squash bugs (Anasa tristis) are a common pest in gardens that attack various types of cucurbits, including all types of squashes, zucchini, pumpkins, gourds, melons and cucumbers. Squash bugs cause significant damage to plants by sucking the sap from within leading to wilting and death.

Squash bug adult, Whitney Cranshaw,
Colorado State University, Bugwood.org 

The adult squash bugs are a flat, oval shape roughly half an inch long and have a brown or grayish-black appearance. They also have distinctive orange-yellow markings on their legs and antennae. Some also have an inverted V or diamond shape in the middle of their backs with white dots around the perimeter. While mainly seen walking on plants, squash bugs can also fly.

Squash bug nymphs, Gerald Holmes, Strawberry Center,
Cal Poly San Luis Obispo, Bugwood.org 

Adults hibernate under debris in the garden and surrounding areas through the winter. Adults become active and first appear in June when they start feeding on young plants. Once they wake and begin to feed, they then begin to look for mates. An adult female squash bug can lay up to 200 eggs in clusters primarily found on the underside of leaves. Eggs hatch in one to two weeks. After hatching the nymphs have green bodies that change to gray after a few weeks. The nymphs usually feed together in groups on the underside of plants. Nymph to adulthood takes 4 to 6 weeks depending on temperature, relative humidity, and availability of food. Pest populations grow quickly during hot and dry conditions and depending on the location there can be one, two or three generations per season. Adults that develop late in the season do not lay eggs.

Squash bug eggs on the underside of a leaf, 
Whitney Cranshaw, Colorado State
University, Bugwood.org 

Using some of the following methods of control will help reduce the population.

Maintaining healthy plants is the best defense against pest in the garden. Crop rotation, removing plant debris, and covering crops with floating row covers are some effective ways to prevent a buildup of squash bug populations. Good weed control is also crucial to reducing squash bug habitat in the garden.

Another solution is planting nasturtium, natural companion plants that work to repel squash bugs, between plants that are affected by the pests. The parasitic fly Trichopoda pennipes is a predator of squash bugs. The larva will burrow into the body of the host, where it will live for approximately two weeks, at which point it will emerge from the host, killing the squash bug.

Handpicking and destroying squash bugs, as well as their eggs, is an effective way to control them. You can also capture them by using a piece of duct tape. Eggs are usually laid in clusters on the undersides of leaves and are yellow to bronze in color. Once you catch them simply drop them into a bucket of soapy water or step on them.

Neem oil is a natural pesticide that can be used to control squash bugs. It works by interfering with the bug’s feeding and reproductive abilities.

Insecticidal soap is a contact insecticide that works by suffocating the bugs on contact. It is effective against all stages of the bug’s life cycle and is safe for use in gardens. You can also mix your own homemade spray using tsp mild liquid soap to a liter of water (always spot-test sprays before using them on any plant).

Chemical insecticides, such as carbaryl (Seven XLR), permethrin (Permethrin SFR 36.8%) and lambda cyhalothrin (Warrior, Matador) can also be used to control squash bugs. However, it's important to follow the label instructions carefully and to rotate insecticides to prevent the development of resistance.

Squash bug damage, Whitney Cranshaw,
Colorado State University, Bugwood.org 

I have learned that the best time to control squash bugs in the summer heat is after a rain or an irrigation because the bugs will come to the surface, where they can be easier to spray or hand pick. During the summer they will bury down into the soil to get away from the heat, which is why after a rain is the best time to remove the pest.

In conclusion, controlling squash bugs requires a combination of cultural, mechanical, and chemical control methods. Early detection and control are crucial to minimize damage to plants and to prevent the buildup of populations.

Learn more about squash bugs and  from the CSU Extension factsheet: Squash Bug: Management in Home Gardens and find out more about growing squash at this CSU Extension fact sheet Cucumbers, Pumpkins, Squash, and Melons


Tuesday, May 16, 2023

Why I Garden


posted by: Susan Magill, Colorado Master Gardener, Douglas County

I see my garden as a metaphor for the essential lessons in learning to lead a full and authentic life. My garden is a place where I encounter the creative energies and rhythms of the eternal life force that both bonds me to everything in nature and animates my spirit.

hawthorn flowers
Gardening is a sacred act, a mutual nurturing of human and earth that dates back to prehistoric times. For example, scriptures from the Bible are sprinkled with references to nature as a teacher of fundamental human truths. Ecclesiastes, for example, declares "To everything, there is a season," while Revelation advises: "Hurt not the earth, neither the sea nor the trees." Every religion has its gardens. Gardens relate to something primordial, offering a connection to beauty, mercy, and grace. I need my garden as it needs me, loving its gifts that multiply with my care.
caterpillar

I accept the basic dynamics of the garden. Plants die on me, and they thrive on me. Plants may never talk back, but they inevitably let me know how they feel. There are no politics in a garden, no controversy. My interaction with a plant is a very singular relationship of my own making. In the garden, I explore myself and my creativity, tolerance, madness, obsessions, level of concentration, and my level of caring. There is no competition in my garden, except with myself.

For the most part, gardening is about solitude. Gardening can make solitude feel like solace instead of the prison it might unfortunately be for some. I relish in the constant process of renewal that is always visible among my plants; there is always hope! A magnificent thing about my garden is that it is never, ever the same from one hour to the next. The light, the wind, the angle of the plants' leaves, the energy levels, they're always changing.

forsythia flowers

As a gardener I give up my preoccupations and focus solely on my labor. It's freeing in that respect because I’m concentrating on entirely on tending nurturing and caring for my plants. My head empties out when I garden, and I become nothing but a force of nature. Gardening eliminates a great deal of the turmoil in my mind because it focuses my energy on doing one simple activity

Any bit of insight I find or connection I make to nature's cycles helps me better understand the essential elements of our humanity and my place in the intricate web of life. In the Garden, I meet nature face-to-face with all my senses, all my physical and spiritual muscles. I am open to the unpredictable, available to life, and ready to learn a lesson or two.

Monday, November 28, 2022

Plant and Insect Diagnostics: Always Something New to Learn

Post by: Lisa Mason, Arapahoe County Extension

My colleagues and I hosted a plant and insect diagnostic workshop in October, a collaboration with CSU Extension and the Plant Diagnostic Clinic at the CSU Spur campus in Denver. About 45 Extension staff and Master Gardener volunteers gathered to build relationships, and learn more about plant pathology and insects. Even though I taught a portion of the workshop, I am always humbled to remember the more I learn, the more I realize I don’t know. For instance, I learned that we have a weedy species of bluegrass (Poa trivialis, rough bluegrass) that can be fairly common in lawns. When the weather heats up, this type of bluegrass goes dormant. The grass turns a slightly purple color before turning brown. This is a great reminder that it is so important to know the plant identification before solving the problem. Brown spots in lawns often are caused by gaps in the irrigation systems, but it’s worth identifying the grass species to see if it could be rough bluegrass. The solutions for irrigation gaps and removing a weedy species in the lawn are entirely different. Overall, the biggest take-home message from the workshop was a reminder to understand the big picture of the plant in the landscape before making any judgements or diagnoses.

Diagnostic workshop participants examine insects in the Orthoptera order (grasshoppers, crickets, and katydids). Credit: Lisa Mason

What exactly are plant and insect diagnostics?

Extension offices around the state receive a broad spectrum of questions at the Extension office varying in topic, need, and complexity. Some examples of common questions include: How do I get a soil test? Is emerald ash borer in my county? What plants do you recommend for low-water/xeriscape garden? Why do I have brown spots in my lawn? Which disease does my tomato plant have? Why is my tree struggling? Are insects harming my plant?

Plant and insect diagnostics differ from many other questions because the plant needs a diagnosis which requires understanding environmental context clues in addition to the signs and symptoms present on the plant. While this might sound easy, the process of diagnosing a plant issue can be very complicated! Consider when you go to the doctor for a medical diagnosis for a persistent fever. A wide variety of bacterial and viral infections, and other ailments could cause a fever. A doctor will ask you questions to understand the bigger picture and look for clues. Depending on the answers, the doctor may choose to run some tests. Test results will further inform a diagnosis. Plant diagnostics is similar. Perhaps you have a plant with brown leaves. Those brown leaves could be a symptom from a number of environmental factors like drought stress or root damage. Perhaps a bacterial, viral, or fungal pathogen is causing brown-colored leaves. In some cases, maybe insects could be causing the damage to the plant.

Three different causes of “brown leaves.” Left: Elm leafminer, a sawfly that feeds within elm leaves creating brown patches. Center: fire blight, a contagious bacterial disease affecting plants in the Rosaceae family. Right: Severe iron chlorosis, an abotic or environmental condition where the plant can’t uptake iron from the soil. Photos: Lisa Mason, William Jacobi, CSU, Bugwood.org, and University of Illinois Plant Clinic.

When you submit a plant or insect sample for diagnosis, be prepared to answer questions! Here are some of the most common questions you’ll be asked after you submit a plant sample:

  1. What do you need answered?
    • Identification
    • Diagnosis and management recommendations
    • Identification and control advice
    • Other
  2. Do you have photos of the plant? Please submit photos up close of the damage and also far away from the plant to see the entire plant in the landscape?
  3. Do you know the identification of the plant?
  4. Where is the plant growing? (e.g. raised bed, next to the house, in the lawn, etc.)
  5. How much water does the plant receive? How is the plant watered?
  6. Do you apply any products (fertilizer, pesticides, etc.) to the plant? What products and how often?
  7. Describe the issues and any observations you’ve noticed.
  8. What part of the plant is affected? (e.g. leaves, trunk, branches, fruit, etc.)
  9. When did you first notice the issue? Are nearby plants affected?
  10. Has anything changed in the environment recently?

A Master Gardener, CSU Extension staff, or Plant Clinic staff will likely have additional questions depending on if the plant sample is a tree, lawn, vegetable, other plant, or insect. All these questions help inform the next steps for diagnosis and management recommendations.

Where do I submit my plant sample?

You have options! CSU Extension and the Plant Diagnostic Clinic partner together to ensure you get an accurate identification and/or diagnosis. When you have a question, or when you bring in a plant or insect sample to your local county Extension office, we make sure to find the right expert to identify and/or diagnose the issue. Depending on the nature of your question or sample, your question may be answered by Master Gardeners, Extension staff or specialists, or experts at the CSU Plant Diagnostic Clinic. Please note some local counties may have a fee and the CSU Plant Diagnostic Clinic has sample fee. Ask your local county office if there is a fee. Click here for the CSU Plant Diagnostic Clinic fees.

Learn more about plant and insects

Land grant universities like Colorado State University have a long history working on plant diagnostics (Iles et al., 2021). If you are interested in learning more about nationwide plant diagnostic efforts, check out the National Plant Diagnostic Network.

Challenges with plants can often be avoided with the right care practices. Learn more by taking classes through CSU Extension on variety of topics related to plants, insects, gardening, and more! Check your local county office, the free webinars on the CO-Horts Blog, or Green School which includes the Colorado Master Gardener program.

What is CSU Spur?

Have you heard of the brand new CSU Spur campus? If not, you’ll want to learn more! Spur is a brand new campus located within the National Western Center in Denver. This campus is open to the public and is worth the visit to see the state-of-the-art research and education facility from art installations, to veterinary care, equine therapy, and more.

The CSU Plant Diagnostic Clinic is now open at Spur! This is the Colorado state lab in the National Plant Diagnostic Network. They offer services such as plant disease diagnosis, insect identification, plant identification, and recommendations.

The Soil, Water, and Plant Testing Laboratory will also be opening at the Spur campus. Stay tuned for their opening date. 

Monday, August 15, 2022

Xeriscaping: Tips on Working with Homeowner Associations

by Robert Sánchez, Colorado Master Gardener

Why should Colorado Front Range gardeners consider xeriscaping?

· According to the Environmental Protection Agency, in dry climates such as the Southwest, residential use of water for landscaping can be as high as 60 percent of total municipal/residential water use and that 50 percent of that water is wasted from inefficient watering methods, totaling billions of gallons of water losses.

· The federal government regulates 2,051 public water systems in Colorado under the Safe Drinking Water Act, but 58 percent of water providers surveyed in Colorado have no dedicated budget for water conservation, meaning that gardeners may have to take the lead on water conservation.
· Colorado winter droughts in 1976-77 and 1980-1981 led to bare ski slopes, empty reservoirs, and poor agricultural seasons, spurring the state to develop the nation’s first drought monitoring and response plan in 1981. The monitoring and response plan has helped local water providers better plan their water availability against water needs, but monitoring drought has not been sufficient to stem the strain on water resources.

Simply put, residential water consumption in the Front Range is not sustainable at the current rate.

Sampling of Front Range homeowners’ stated reasons for xeriscaping:

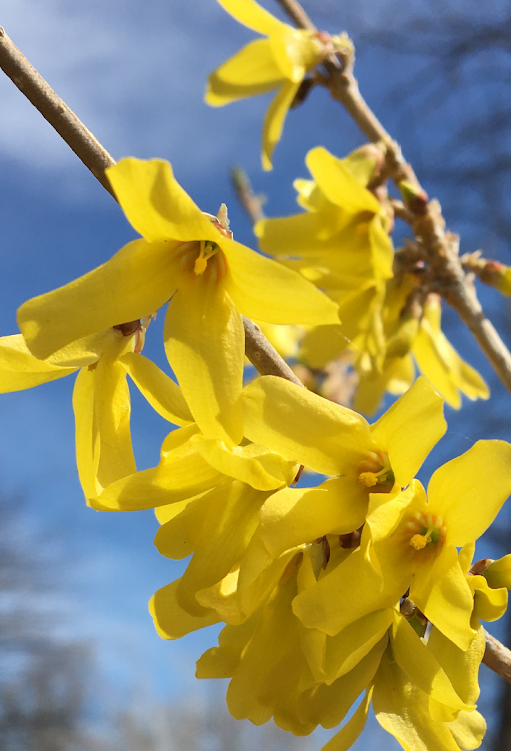
  • Sustainability - want to prevent water waste
  • Aesthetics – xeriscape looks healthier than turf during hot summer months
  • Cost – irrigating turf is expensive
  • Financial incentive – some water providers or communities offer rebates.

Fortunately, Colorado and many water providers in the Front Range are on your side. Unfortunately, HOAs are not always on your side, though many are coming around. Below are some tips on navigating HOAs and a list of potential resources to help you decide if you want to xeriscape and how to do it. This post does not address the advantages and disadvantages of xeriscaping, which may include a variety of considerations, including effects on property value based on the desire—or lack thereof—of xeriscape.

Colorado Revised Statutes 37-60-126, amended multiple times between 2005 and 2021, gives rights to residents living in HOAs. Regarding HOAs, the statutes state that limiting xeriscape, limiting the use of drought-tolerant vegetative landscapes, requiring turf grass, or limiting the use of non-vegetative turf grass in the backyard is unenforceable. This means that HOAs cannot force you to have turf in your front or back yards and cannot limit you from xeriscaping, but they can enforce design and aesthetic guidelines, such as the type and number of drought-tolerant plantings or the amount of non-vegetative material in the front yard. For example, one HOA states that any front yard landscape must consist of at least 70 percent living plant material, meaning that only 30 percent can be “zero-scape,” such as a field of rock or mulch.

Tips on Navigating HOA Landscaping Requirements

1. Be patient, and be aware of timing requirements.

     Many HOAs have committees that review and approve of landscape designs. They may meet once or twice per month and you should be aware of their schedules and their workloads, particularly if you are on a schedule.

    One resident said that her town offers a xeriscape rebate, but that she must meet a tight timeline to get her design reviewed and approved by the HOA before she can submit it to her town. If she misses the submission deadline, she will not qualify for the rebate, which is a substantial one-time incentive for installing low-water landscaping.

    One resident said it took her two years from her initial submission to her HOA until the HOA approved it. Her water provider offered a rebate, but the rebate had no time constraints.

2. Know Your Association Requirements

    Some HOA requirements are not clear and may seem contradictory. Consider requesting clarification, if needed.

    Some HOAs require documentation that adjacent neighbors have been advised of your xeriscape plans and, since xeriscaping is relatively new in some HOAs, you may want to be prepared with legal information and positive neighborly discussions in the event your neighbors protest your plans.

    One resident said his HOA did not know about the law or even if the HOA had criteria or guidelines for xeriscaping when he attended a meeting to present his xeriscape plans. He said it took some diplomacy and education to get the HOA on board. However, he said he was well prepared.

    One resident said that her HOA guidelines were vague. She was turned down on her first submission, but the HOA did not give her actionable explanations to successfully resubmit. She said she had to press the HOA for specific reasons for the denial and that it back-and-forth e-mails and a face-to-face meeting over a period of time before she was able to clarify what she needed to do to successfully resubmit her design.

3. Don’t Be a Stranger to Your HOA

    One resident said going to Board meetings before you submit a proposal is a good idea so you don’t become the resident who only shows up when you want something.

    One resident said that if you are involved in some HOA event or process, you are likely to have credibility with the HOA, which could contribute to a quicker review process.


 Resources to Help You Out

Below are examples of resources provided by some metro area cities to residents. Be sure to check out your own water provider, county, and municipality to see what they may provide.


Water Provider or Town

Xeriscape information?

Assistance?

Aurora Water

Yes – on website and with links.

Rebates on water-wise landscaping.

Provides free water-wise landscape designers.

Provides free water use assessments.

Provides free troubleshooting for your irrigation system.

City of Golden

Yes – with links.

Rebates on smart irrigation technology.

Provides free irrigation system inspections.

Castle Rock Water

Yes – on website and with links

Rebates on replacing turf with water-wise landscaping and free classes

Denver Water

Yes – on website and with links.

Rebates on irrigation products.

Provides many helpful links, including links to organizations who do provide xeriscaping services.

Provides free monthly summertime water usage reports.

Thursday, June 23, 2022

Keeping Cats Out of Your Garden

Keeping cats out of your garden

By Rhiannon Rowe, Eagle County CMG 


As a lifelong cat lover, I hate hearing about how much of a nuisance they can be to gardens and yards. Not to mention the stress they can put on the local bird population! Before I jump on my soapbox about keeping your cats indoors, I know that many cats prefer to be outdoors and are not suited for an indoor lifestyle. With that being said, the best we can do is find ways to deter our feline friends from wreaking havoc on our plants. Cats can smell 14 times better than humans so the best place to start would be planting or placing scents around the yard that cats do not prefer. Citronella, lavender, peppermint, rosemary and chives are all common plants that cats are not fond of. Added bonus is that many of them attract bees and smell great to us! Coffee grounds and citrus peels are also a good idea, plan to replace them often to keep the effect going.

There are a few commercial deterrent sprays you can find in pet stores or online. Just make sure they are safe to use around plants before you start spraying. Barriers can also be effective by physically keeping the cat away from your garden although they can make it tough to reach your plants. Netting can help protect your younger plants as well as putting a ring of pine cones or anything prickly around the plant as cats don’t like to walk on surfaces that aren’t soft. A friend of mine likes to put plastic cutlery around her garden and swears it helps!

Water can be used in a few different ways. Motion activated sprinkler systems can work as well as posting up with a SuperSoaker to catch the cat in the act. Cats aren’t fans of water and it shouldn’t take more than a few times for them to realize that they aren’t welcome! Using water to wash away an intact male cat’s urine scent can also help as well as removing anything that a cat is using to mark his territory.

There are several other ways to deter cats from a garden but these are my favorites! If these ideas aren’t helping, it may be time to speak to your neighbors about their cat’s behavior and try to come to an understanding. If you aren’t sure who the cat belongs to or if it is a feral cat, contact your local shelter. They can pick up the cat and check for a microchip. If the cat is feral, they can help you set a humane trap to try and remove the cat from your premises. 

Finally, cats are conditioned to stay in an area that is comfortable and welcoming to them. If there is food present, their hunger is taken care of. If there is loose dirt, they have found a litter box! If there are fun things to chase such as mice and birds, they have plenty of entertainment! Finding ways to take these luxuries away will help the cat realize that they need to move on and find a new place to enjoy.

Tuesday, May 24, 2022

Converting to Xeriscape, with some help!

Guest post from Adams County Colorado Master Gardener Heidi Stark. 


Plants laid out after arrival 

I recently helped a relative convert about 200 square feet of turf in her yard to a xeric garden. She had been contemplating it for a while, realizing that the grass in that area was chronically thin with large bare spots. There are organizations like ReSource Central that provide garden kits to help jump start a xeriscape conversion. In early spring, she did some research and decided to purchase a Garden in a Box to replace the existing turf. She settled on the Splendid Seasons box, the largest one offered on the Resource Central website. The kit offered a nice mix of grasses and herbaceous perennials that create interest in her landscape 365 days a year.

Since xeric plants are happier growing in a leaner soil with less water than turf, she added two tons of squeegee, small rock about ¼-inch in size, that increases drainage and reduces the present organic matter to roughly 3% to 4%. She had the squeegee tilled in to a depth of 6 inches.  Then she waited to be contacted by Resource Central that her plants were ready!

Figuring out the best spacing

The Garden in a Box system is a great way to put in a xeric perennial garden without much forethought. The predesigned kits have landscape plans that are simple to comprehend and have a color layout with mature dimensions on the gridded paper that anyone can follow to plant a diverse, colorful, exciting design. There are many options for almost anyone’s desires. You can look up in your area to see if your city, water service or other providers have resources for you to do a similar conversion. 

When the plants arrived, we set a day to plant. First, using the color layout plan, we took each container and set it out on the prepared area with sufficient space between the plants to represent what mature size would be. At first, we thought there would be too many plants for the space. However, once all the pots were placed on the ground, it was evident that they needed to be spaced further apart to make the area symmetrical. So, we inched the pots here and there until the layout looked right. 

Root washing small plants is
easy with a plastic bucket

Since the plants are grown in a nursery under ideal conditions in cushy container soil, we decided to root wash each plant before putting it in the ground. This encourages the roots to spread out into the native soil and avoids circling roots, which can be detrimental.  

The entire planting process took about two hours.  We watered the newly planted perennials and stood back to admire our work. She now plans to convert her existing sprinkler zone to a drip system. She purchased some conversion kits for her pop-up sprinklers that will direct the correct amount of water to each plant. Since she can manually regulate the water to that zone, she will not overwater these plants as she might if they were planted in an area on a schedule that’s programmed for turf. Once established, which can take up to two years, these plants should not need any extra irrigation unless we experience a prolonged hot, dry period. 


The finished result - For this year!

Total cost of the project was roughly $700 between the cost of a landscaper rototilling in the squeegee, the Garden in a Box package, and the sprinkler conversion parts. Some water districts are helping to defray the cost of such a turf conversion to encourage residents in the Denver area to make this change.


As she said to me before I left, “It will be interesting to see how it thrives in year 2.” And how much this change will make a dent in her summer water bill.


Friday, April 29, 2022

Perennials: Why, When & How to Divide Them

Posted by: Judy Kunz, Master Gardener, Arapahoe County

Perennials are a great addition to any garden, but some may need to be divided after a few years. Make note if they are no longer blooming, have developed bare spots in the center, are floppy or they have outgrown their space. However, not all perennials should be divided at the same time. Spring is the ideal time to divide summer and fall blooming perennials while spring blooming perennials should be divided in late summer or early fall.

Dividing summer and fall blooming perennials in spring is preferred because the plants are not expending their energy to produce blooms at that time, and they tend to be smaller and easier to handle. Spring division also gives plants the upcoming growing season to direct their energy toward producing a healthy root system before blooming later.

Photo: North Carolina State University Extension

Some of the goals of dividing perennials are to improve the health and appearance of the plants by increasing the amount of light and air available, to increase flowering, to relocate plants that have outgrown their space or to increase the number of plants, more commonly known as plant propagation.

Before dividing existing plants, it is important to think about the feasibility of the new site. Consider the size and height of the new plants, as well as the amount of sunlight hours available. For ease in handling and transplanting, perennials should be divided just as new growth begins to emerge in the spring. To minimize plant dehydration, choose a cooler day in spring when the ground is moist and can be easily worked. Overcast weather is ideal. After dividing, rinse roots with a hose or dunk them in a bucket of water. Trim any dead growth and plant new divisions at the same depth as the parent plant. To minimize plant shock, it is helpful to have the transplanting hole prepared. Roots exposed to air can dry out quickly. Water in after planting and continue to monitor soil moisture during the growing season.

Photos: left, provenwinners.com; top right, forsyth.ces.ncsu.edubottom right, littlehouseinthesuburbs.com

Perennials have three basic root systems that are handled somewhat differently at the time of division:

  • Plants with spreading root systems like ornamental grasses have thick, fibrous roots. They can be divided by pulling apart or by cutting with a sharp shovel or garden knife. Each division should have at least three to five shoots with roots included.
  • Hostas or daylilies have clumping root systems that can be divided by pulling them apart, by cutting through the crown with a sharp knife, or prying them apart using two back-to-back pitchforks facing outward. Each division should include several buds with roots.
  • Plants like iris have underground rhizomes that are actually thick, fleshy underground stems with roots attached. These plants require division by cutting with a sharp knife or shovel. Replant new divisions with the rhizomes at or slightly below ground level. In the case of iris, trim the leaves to prevent wind from uprooting the new transplants.

It will take several seasons for the new plants to reach their previous size, but dividing them now is well worth the effort. They will reward you with stronger, straighter stems, healthier foliage and more robust flowering.

By the way, don’t forget to share extra cuttings with friends!

Here is more information on perennial dividing, plus a PDF listing common perennials and when to divide them.

Thursday, April 21, 2022

Increasing Carbon Dioxide for More Productive Plants?

Musings of a Cell Biologist on the Way to Becoming a Colorado Master Gardener

Posted by Kristin Moore, Master Gardener Apprentice  

As gardeners we spend a lot of time trying to figure out how to make our plants grow as productively as possible. However, if we really boil down the major constituents that make up a plant, it comes down to a small number of chemical molecules and elements. Water, which is generally taken up through the root system of a plant, can make up 80-90% of a live plant’s mass. However, if we take water out of the equation, the chemical elements that make up the vast majority of the dry mass of the plant (the mass recorded after water has been dried out) are carbon and oxygen, which combined make up approximately 90% of the dry mass of a plant. Another 6% dry mass is made up by hydrogen. The remaining 4% of plant dry mass is made up of the other 17 essential nutrients that we spend lots of time (and money) supplementing our soil with (examples: nitrogen, potassium, and phosphorus). While those other 17 nutrients are absolutely essential to plant growth and productivity, I am going to focus on the 90% of the plant that is carbon and oxygen for this article.

Have you ever stopped to think about where all the carbon and oxygen that make up most of what we’d really consider to be a plant (leaves, stems, bark, etc.) come from? Your initial response may be that they come from the soil and get incorporated into the plant through the roots. If so, you are not alone in this assumption (See this video that asks graduating MIT students this same question). In reality, all of the carbon and most of the oxygen come out of the air. Photosynthesis, the unique trait of all green plants (and some bacteria and algae), is the process of utilizing energy from sunlight to convert gaseous carbon dioxide (CO2 - a carbon atom bonded to two oxygen atoms) into the sugars and structural molecules such cellulose that makes up the energy storage and fibrous tissue of most plants. Plants do not actually “suck up” carbon from the ground. That 90% of the dry mass of a plant came from converting the CO2 in the air into carbon-based molecules in the plant.


This fact then begs the question: in an era of increasing CO2 emissions and concentrations in our atmosphere, might plants actually benefit from increased concentrations of carbon in their environment? Could they grow bigger faster since one of their major nutrients is now in excess? As it turns out, the answer to this question is a lot more complex than it may initially appear. There is strong evidence that increasing atmospheric CO2levels does increase the photosynthetic rate of plants. This results in larger, faster growing plants. Higher CO2concentrations also results in less water loss for many types of plants. This is because plants have to open up pores on their leaves called stomata to let CO2 from the air into the plant. When stomata are open, not only can CO2 come in, but water can also escape out into the air. With higher CO2 levels these pores are open for less time resulting in less water loss from the plant.


That all sounds pretty great! Bigger plants with lower water consumption! However, the increased rate of carbon incorporation into plant tissues results in increased amounts of sugar (mostly made of carbon and oxygen) compared to protein (lots of nitrogen) in a plant. Thus, plants grown in elevated CO2 may not have the same nutritional value (more sugars and less protein) as those grown under current CO2 levels. There is evidence to indicate that insects feeding on these plants have poorer outcomes and cause more plant damage as they try to make up for these nutrient shortcomings. One way to fix this imbalance may be to increase nitrogen supplementation through fertilization, which can be costly and have other impacts. Additionally, the impact of having extra sugar molecules accumulating within the plant is unknown. While sugars provide energy and structure to a plant cell, they can also signal plants to make changes in the way they grow. We are just starting to gain an understanding of how the increases in sugar accumulation due to increased CO2concentration would impact this facet of plant physiology. Lastly, the overall increase in temperatures that accompany increased CO2 production as well as the changes in weather patterns will ultimately have a huge impact on plant growth and productivity. Many of the current predictions indicate that these will not increase plant yields.


Schematic from 'Preserving the nutritional quality of crop plants under a changing climate: importance and strategies' (Soares et. al., 2019). GHG = greenhouse gas; eCO2 = elevated carbon dioxide; Single letter chemical element abbreviations outlined in red boxes; OM = organic matter. 


Combined, all of these data indicate that the impacts of changing levels of atmospheric CO2 on plant physiology, production, and value remain…complicated at best. Although increased plant growth and decreased water consumption are consistent results in many experiments run under increased atmospheric CO2 concentrations, there is an upper limit to this increase. Furthermore, how these plants will adapt to their new environments (water availability, temperature, growth season length, etc.), and whether they will have the same value as those grown today is uncertain. What is certain, is that our changing environment will ultimately results in changes to plant productivity and their critical role in the global carbon cycle.

Monday, January 18, 2021

New Year, New Garden

 Posted by: Charleen Barr, Master Gardener in Larimer County

A new year in the garden promises and delivers a fresh start, a chance to fix all errors I have made in the garden and improve or transform those spaces that need extra attention. Now is the time of the year when I have plenty of days to think about what changes to make. The failures of last year have faded and it is time to gather ideas, and make some garden resolutions.

[courtesy of Creative Fabrica]


Continuing education is high on my priority of resolutions for 2021. I am excited to learn through our Extension Continuing Education classes. Although Zoom is not my favorite way to learn, I appreciate the expertise, preparation and I pay attention to the ideas presented. If you haven't looked, there are dozens of recorded classes posted on this blog--the page also includes those coming up. In 2021, I am hopeful that we may be able to enjoy the sharing of ideas and resources of our fellow Master Gardeners with the public.

Simplifying garden tasks as I get older requires some planning. I want to keep flower and vegetable gardens small, so they are easier to manage. A smaller garden helps with weed control.

I will not buy plants without a plan. I have dozens of seed packets that looked enticing in the catalog or store, but never got planted – not enough time or space! I also have had pretty plants that die in their pots without being transplanted.

Everyone loves the bright, showy cultivars of butterfly bush, petunias and daylilies, but these introduced species can be high maintenance. This year, I resolve to plant additional native species for a more sustainable garden that is easy to maintain. Native plants are adapted to our local climate, weather, and pests. They can handle periods of drought and sudden freezes, and require little, if any, fertilizer to thrive. Native plants also help sustain the backyard pollinators that return to my yard year-after-year.

Rocky Mountain penstemon (Penstemon strictus), one of many native plants that do well in Colorado gardens. Photo courtesy of durangoplants.com.

Garden resolutions require determination or they will not happen. Plus, sometimes we need someone to help make gardening ideas come true, like a partner in crime so to speak. This is when I enjoy using my grandchildren. They are totally stimulated by earth worms, crawling insects, and up close and personal inspections of plants. Gardening should not be all work. The more time we spend enjoying and sharing our gardens the more rewarding they will be.

Monday, January 11, 2021

The Winter Blues...and Greens and Yellows and.....

By Donnetta Wilhelm, Colorado Master Gardener, Arapahoe County

Psychology Today reports that moods are affected by what is absorbed through the five senses. Sight, sound, touch, taste, and smell are processed both neurobiologically and emotionally. Those who are prone to the winter blue moods or the more serious seasonal affective disorder (SAD), take heart. During the winter months, Colorado is a wonderful place to get outside. Take a daily ‘light break’ to visit the landscape and elevate your mood by pleasing the five senses to help chase away those winter blues. 

 SIGHT


Arctic Sun Dogwood
photo credit: pridescorner
Winter doesn’t have to be bland. Admire the colors and shapes that stand out. Arctic Sun Dogwood (Cornus stolonifera 'Cato') has stunning red, orange, and yellow branching while Harry Lauder’s Walking Stick (Corylus avellana 'Contorta') with twisted growth habit is a beautiful sight in the winter landscape. Peking Lilac (Syringa pekinensis) shows off exfoliated reddish-brown bark, and don’t forget the weeping evergreens that accent the landscape with graceful beauty.

SOUND

Crimson Spire Oak
photo credit: midpark

At first listen, the sounds of winter seem boring. But step outside and hear the welcome sound of crunching snow underfoot.  Listen closely to the rustling plumes of ornamental grasses.  Breezes whisper through the foliage of marcescent tress like oak, beech and hornbeam.  Crimson Spire Oak (Quercus robur x Q. alba 'Crimschmidt') retains it leaves until spring.  Sounds can also be heard coming from evergreen and deciduous shrubs where birds flutter about in search of berries and seeds. 

 TOUCH

Mountain mahogany seeds
photo credit: plants of the southwest
Feel the crunch of dried seed heads on perennials, the softness of fleshy succulent leaves, or the rough scales of pinecones. Touch a variety of tree and shrub bark textures like the warty bark on Hackberry (Celtis occidentalis), the shredding bark on Beautybush (Kolkwitzia amabilis), and the flaky bark of Smoketree (Cotinus coggygria). Who can resist the feel of the soft needles of evergreens like Southwestern White Pine (Pinus strobiformis), White Fir (Abies concolor) or Yews (Taxus)? Caress the odd-shaped, fuzzy seeds that cover the winter stems of Mountain mahogany (Cercocarpus).

TASTE

What does winter taste like? Canning or freezing delicious produce such as tomatoes, carrots, corn, peppers, and pickles can become favorite winter flavors. Root vegetables such as carrots, beets, turnips, rutabagas, and parsnips that are removed from the ground in late fall will remain fresh with proper storage; think root vegetable risotto on a cold winter evening. Garlic stored from the July harvest and herbs grown indoors provide mouthwatering flavor. Many recipes transform edible parts of landscape plants into a myriad of teas and soups. Preparing salsas, sauces, and relishes from vegetables, and butters, jams, jellies, and marmalades from fruits can result in a delicious taste of winter.

 SMELL

Cook's Peak Arizona Cypress
photo credit: csucohort blogspot

Science has proven that noses are not as sensitive to smells in the winter as odor molecules move slower in colder weather. Besides winter’s chimney smoke, there are wonderful scents in the landscape. Evergreens such as firs (Abies), pines (Pinus), cedars (Cedras), junipers (Juniperus) and cypress (such as Cupressus arizonica 'Cooke Peak') release an aroma when the foliage is touched. Persistent berries on many shrubs or crabapple trees are fragrant, so gently remove berries from the branches and enjoy the fruity scents. Mojave sage (Salvia mohavensis) and Jerusalem sage (Phlomis fruticosa) are not only ornamental in the winter, but still maintain that strong scent enjoyed during the growing season. Perennial herbs with outdoor hardiness (lavender, creeping thyme, oregano) are also sure to stimulate the sense of smell.

Find plants in the landscape that delight the five senses that can improve the winter blues. If it is difficult to find something, make a plan to plant something next spring that will provide a mood boost next winter.

Thursday, September 17, 2020

Pueblo Edible Landscapes Project

By Sherie Shaffer, Horticulture Agent, CSU Extension-Pueblo County

This summer, our Master Gardeners in Pueblo County didn’t have a lot of chances to volunteer in the community due to COVID-19. Luckily they were able to participate in a few COVID safe projects, one of them being a partnership with a local organization, The Pueblo Food Project, called the Edible Landscapes Project.

This project is an initiative to provide fresh produce to anyone who wants or needs it, and also to provide education to the community on growing food.

The project had three public sites, each with 2-3 volunteers working at them. Through the PFP, the volunteers were given a budget to buy plants and prepare their planters. Edible plants were added to each site, and signage was added to encourage passers by to take any produce that they wanted. Any excess produce is being donated to local food banks.

Later on in the year, signage was added that explained what was growing the plots and gave information on how to use it, nutritional value, and growing tips. Videos were also made that showed off the gardens and promoted them to the community.

Community members definitely took advantage of the fresh produce up for grabs. I live just down the street from the Mineral Palace Park site, where I walk almost daily, and have seen countless people picking produce and just marveling at the magnificent plants growing there.

We are at the end of the season, and we did have a freeze a couple of weeks ago, so the plants are starting to lose their luster a little bit, but that being said they do still look pretty good. Here are some photos of one of the sites that I took today, complete with a photobomb by my bloodhound, Layla. To see the gardens earlier in the year and get a personal virtual tour from our Master Gardeners, check out the videos linked above.