CO-Horts

CO-Horts Blog

Showing posts with label Pueblo County. Show all posts

Monday, April 18, 2022

Going Drip

By Sherie Shaffer, Horticulture Agent, CSU Extension-Pueblo County

I love growing a vegetable garden. Ever since I can remember I have grown some type of veggie garden every year. I also have hand watered ever since I can remember.

Hand watering has its perks. Being out in the garden every day, up close and personal with your plants allows you to see any problems that may arise and be on top of anything that is ready to harvest right away. The issue, for me, with hand watering, is that I just don’t have the time. For the last couple of years, I have let my garden dry out too much and have had small harvests because of it.
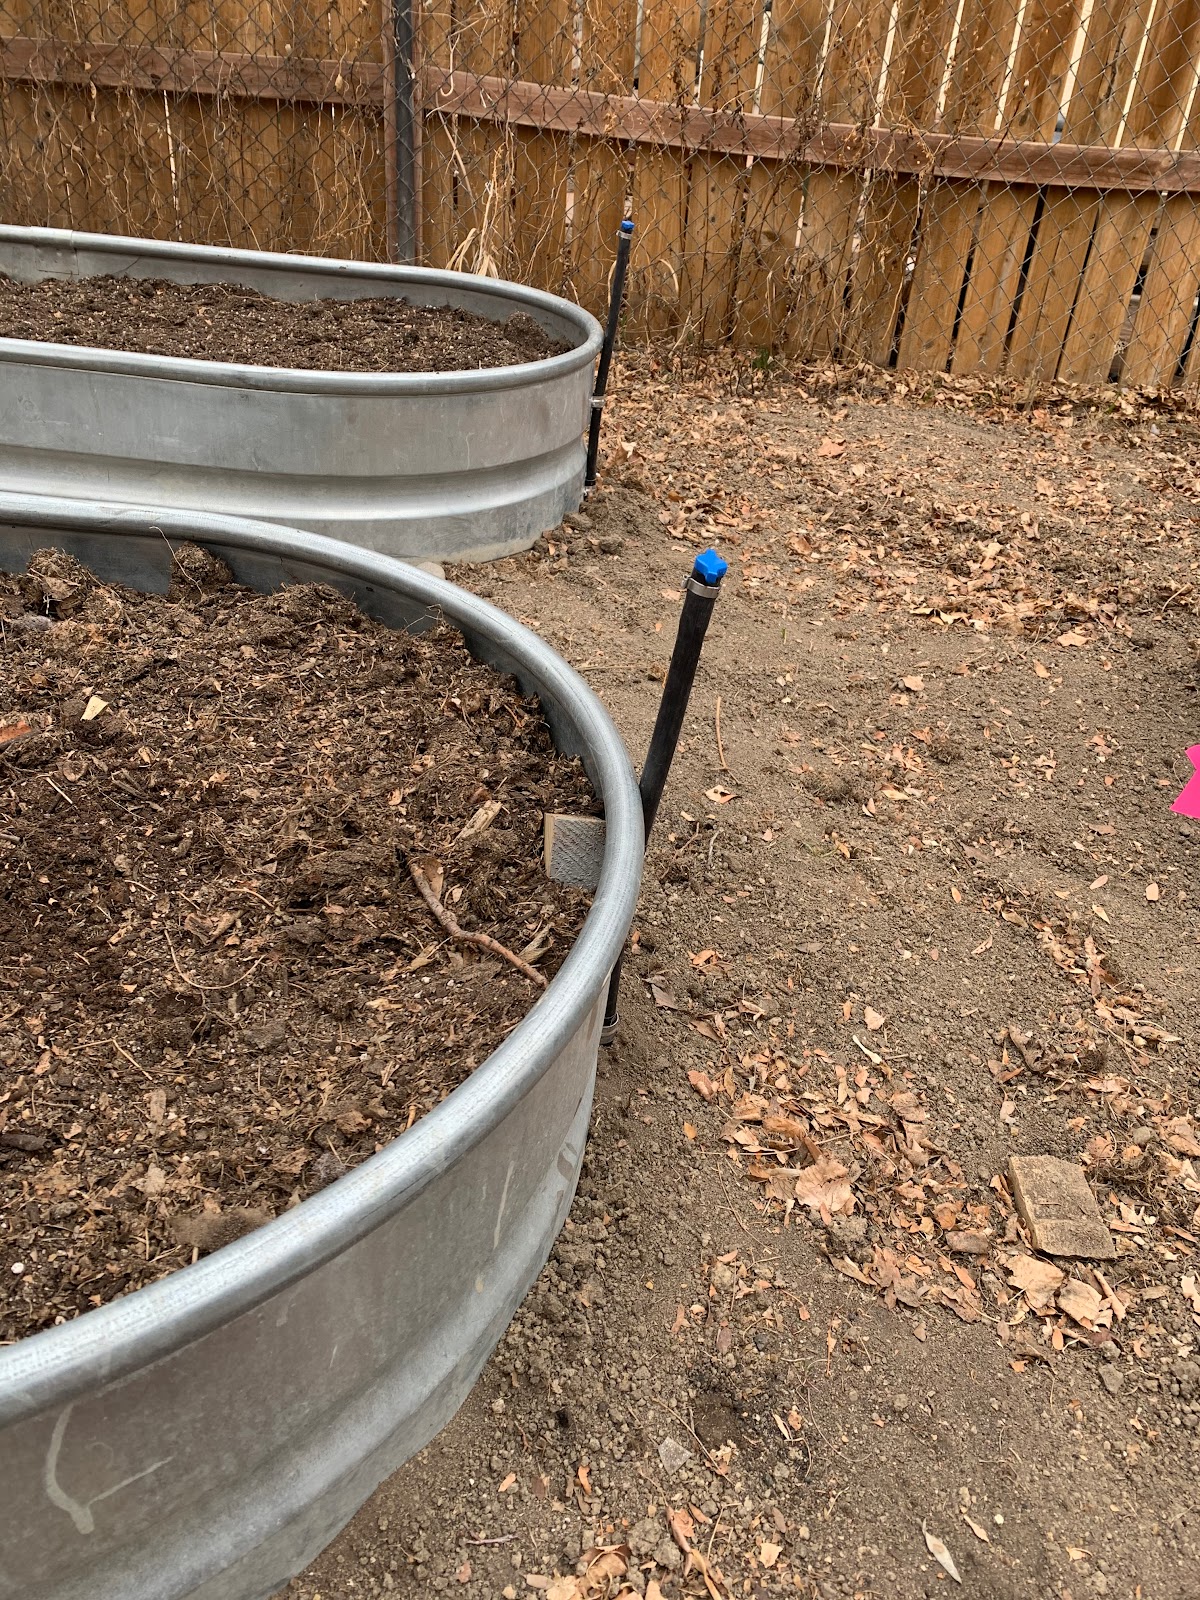
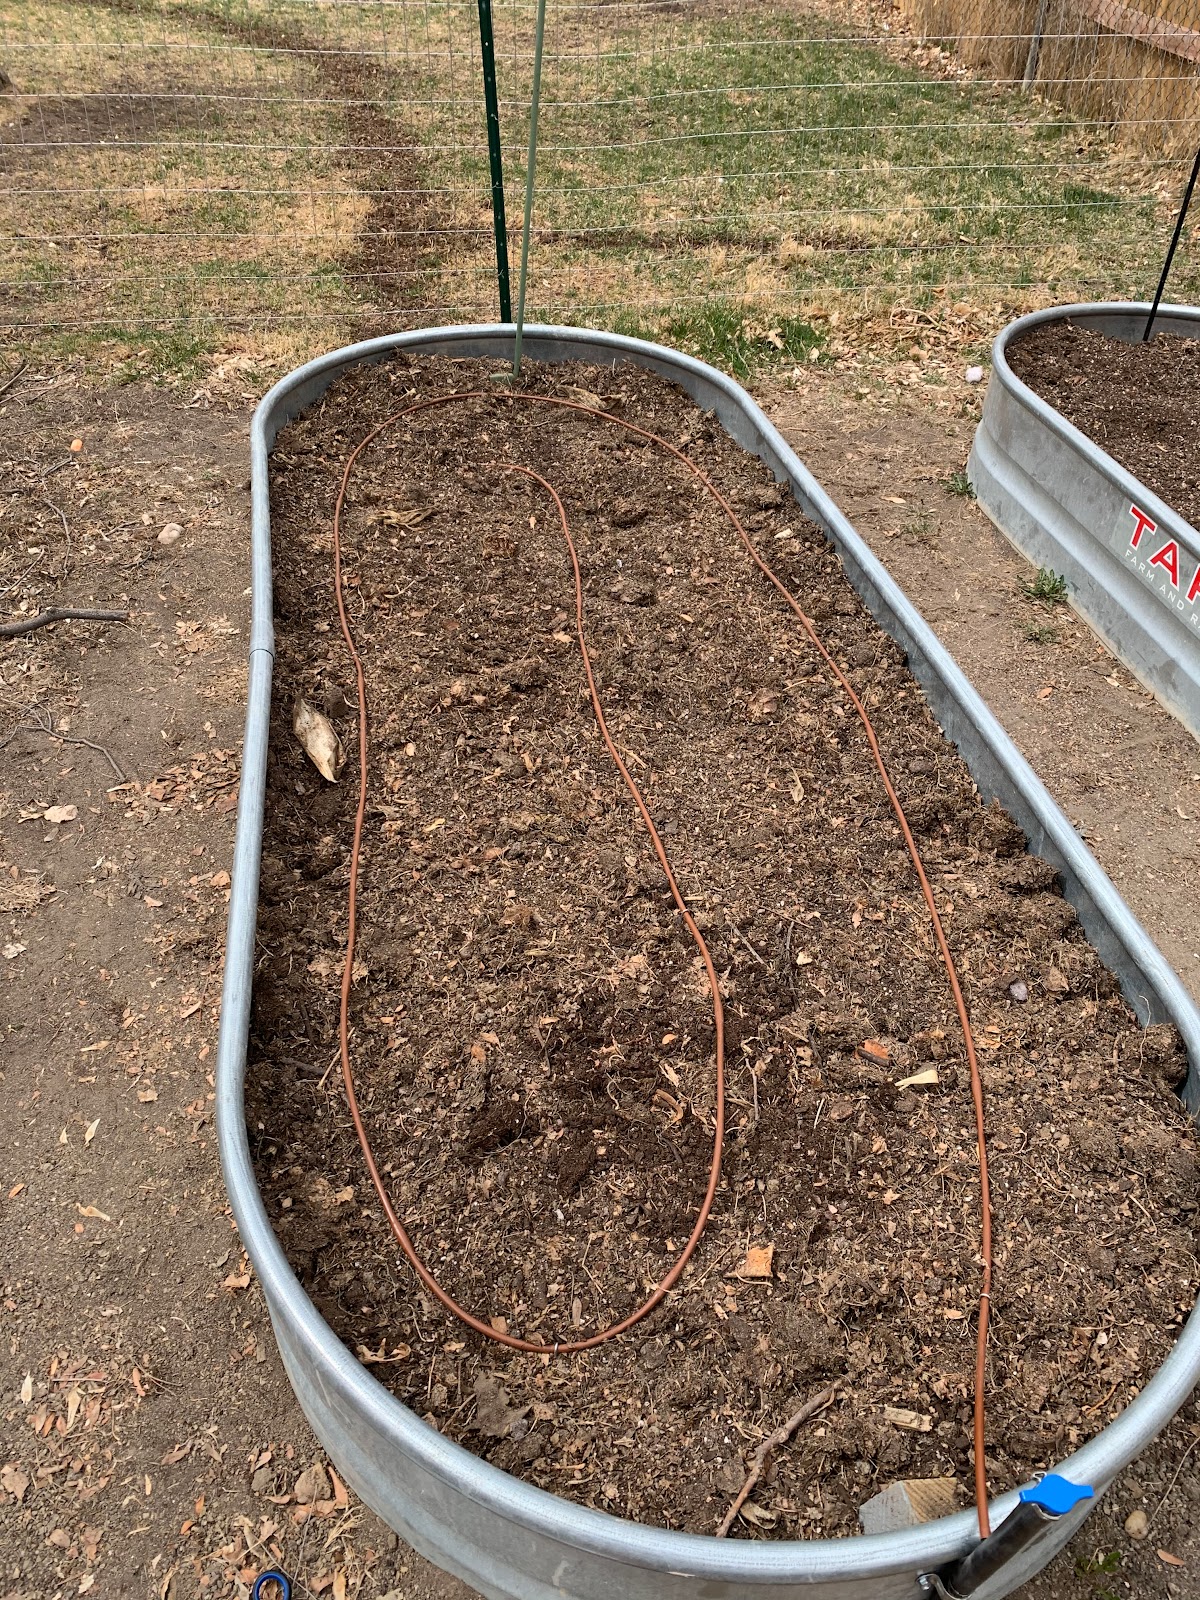
My beds with the supply lines

That’s why this year, we are going drip. Drip irrigation has many benefits. The main one for me, is that I can turn it on and water the garden without spending the time filling up my watering can and watering by hand. I bought a fancy timer that I can work from my phone, so I can even turn on my drip system from the office, or my bed, I am so excited. Drip irrigation applies water right to the soil, where the roots are, so it is very efficient. Letting water splash on the leaves of your plants encourages disease, another reason drip is beneficial.
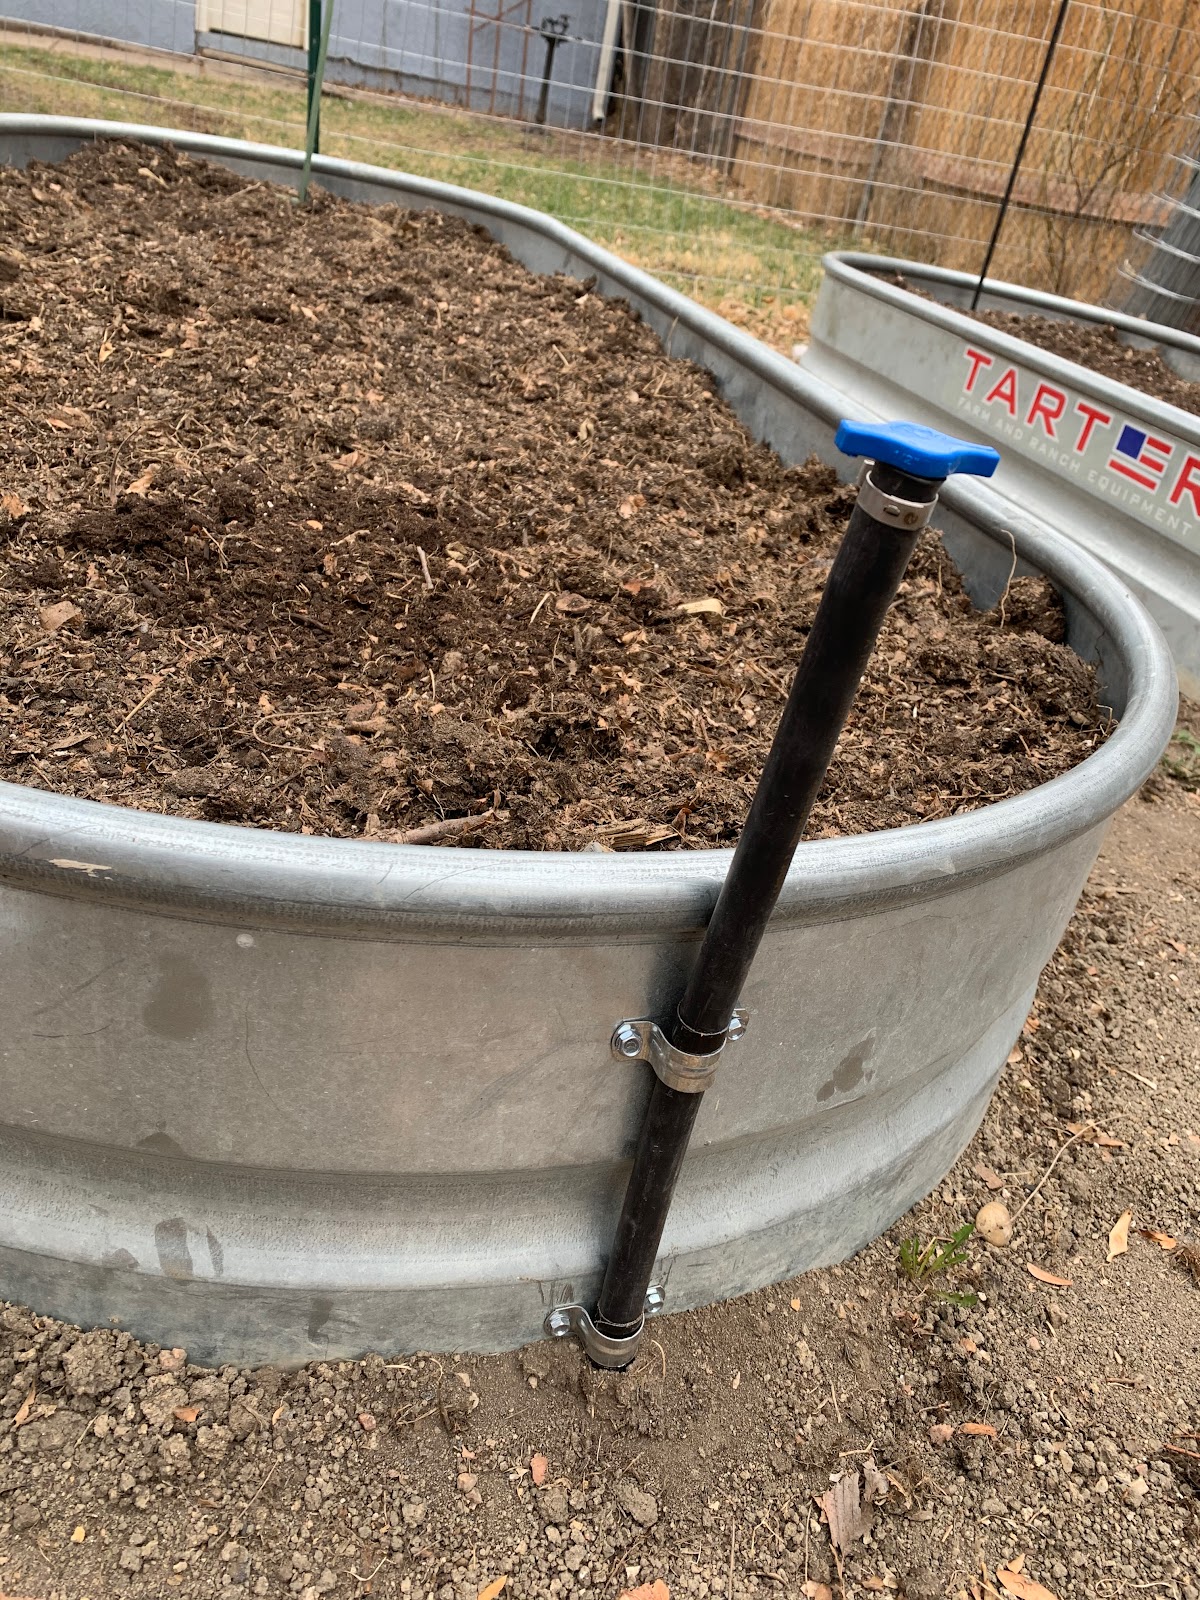

It has been a bit of an adventure getting my system set up. I did a lot of research and had my method down, in theory, but when you get to real life sometimes things don’t always go as planned.

When I had my sprinkler system re-done last year, I designated a couple of zones to use for drip systems. We had the water supply ran to where we wanted it, and installed a filter, and pressure regulator in an underground valve box. From there I had the water supply lines ran to my garden beds.
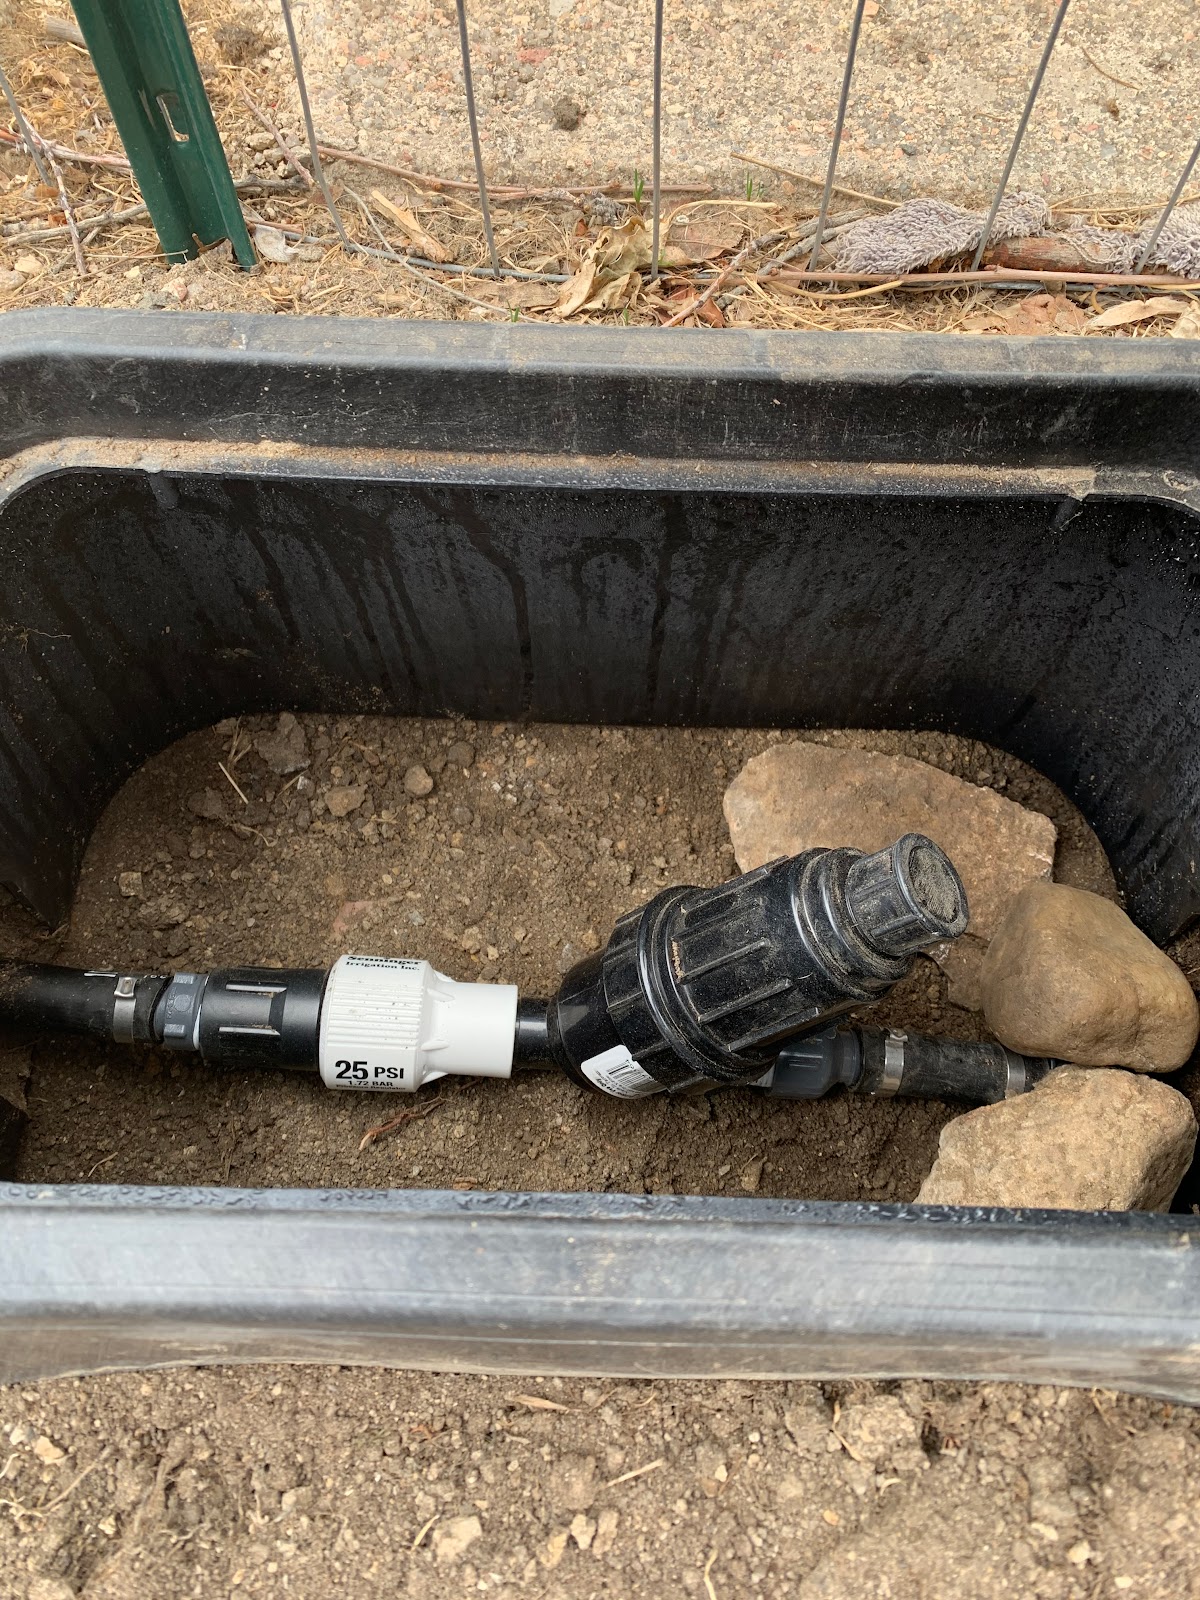
The valve box with the filter and pressure regulator

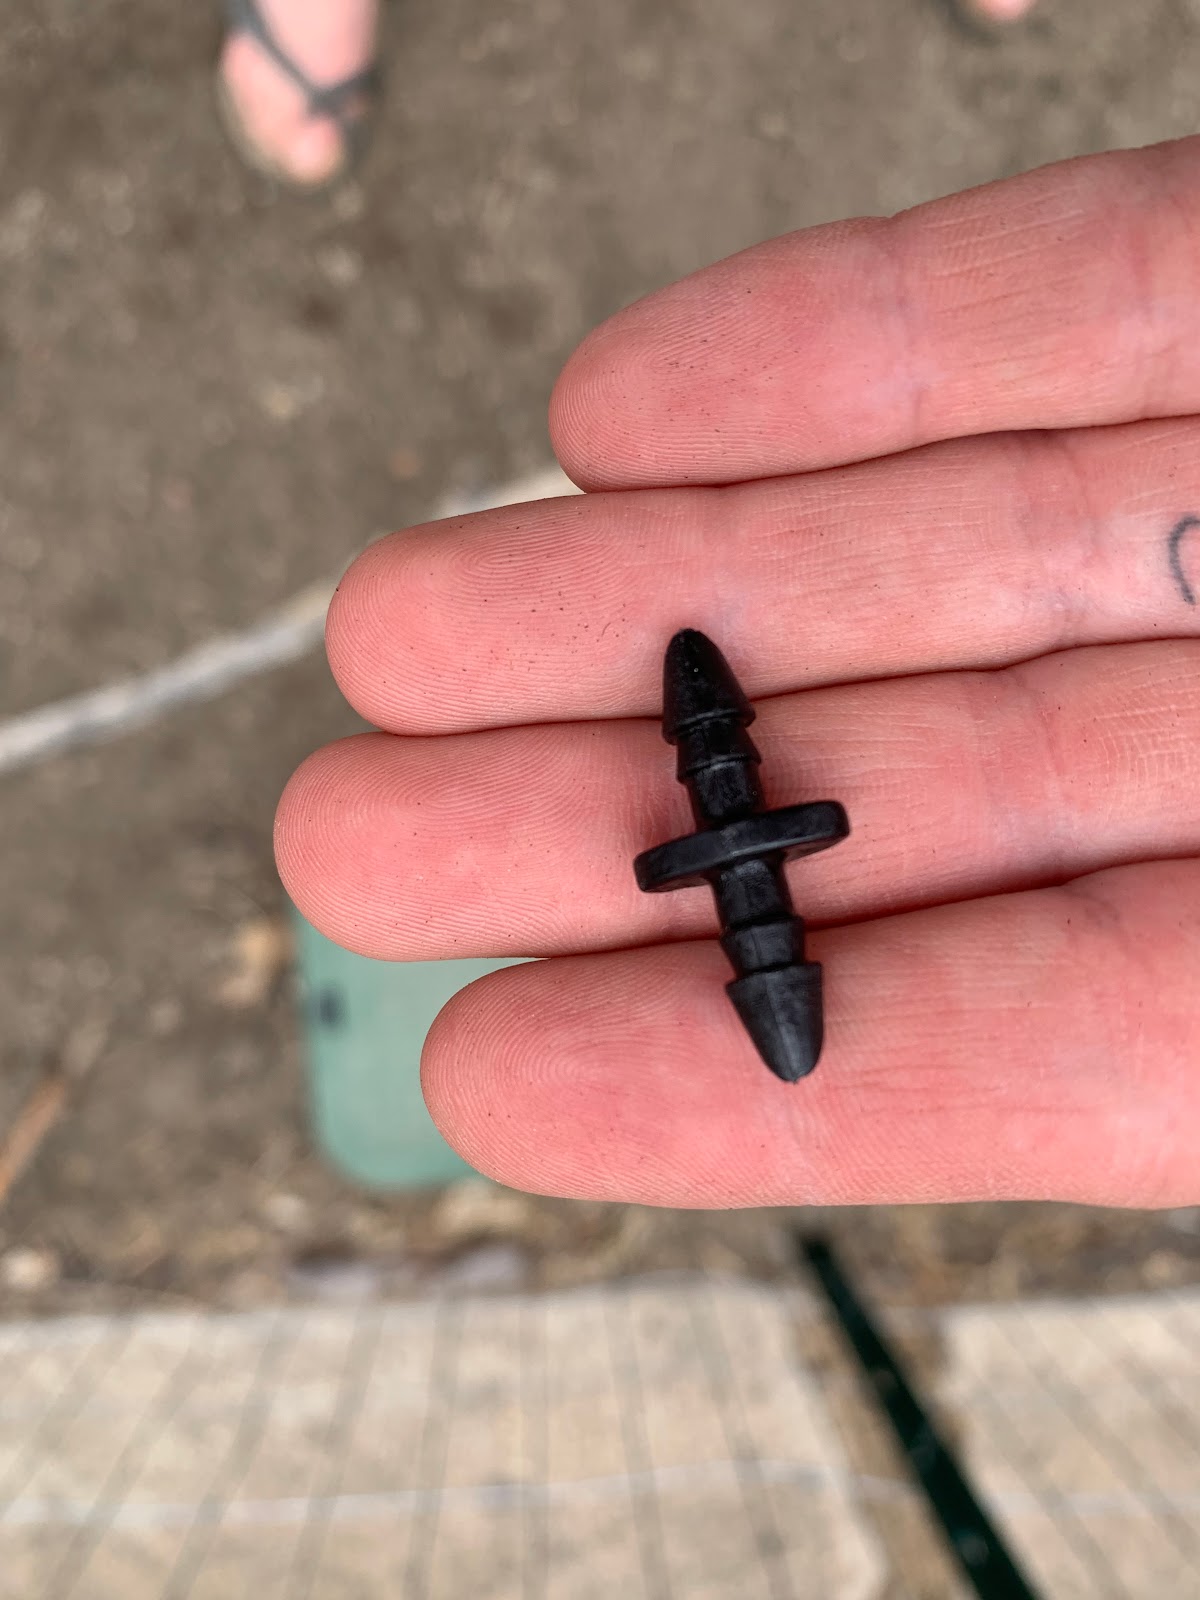
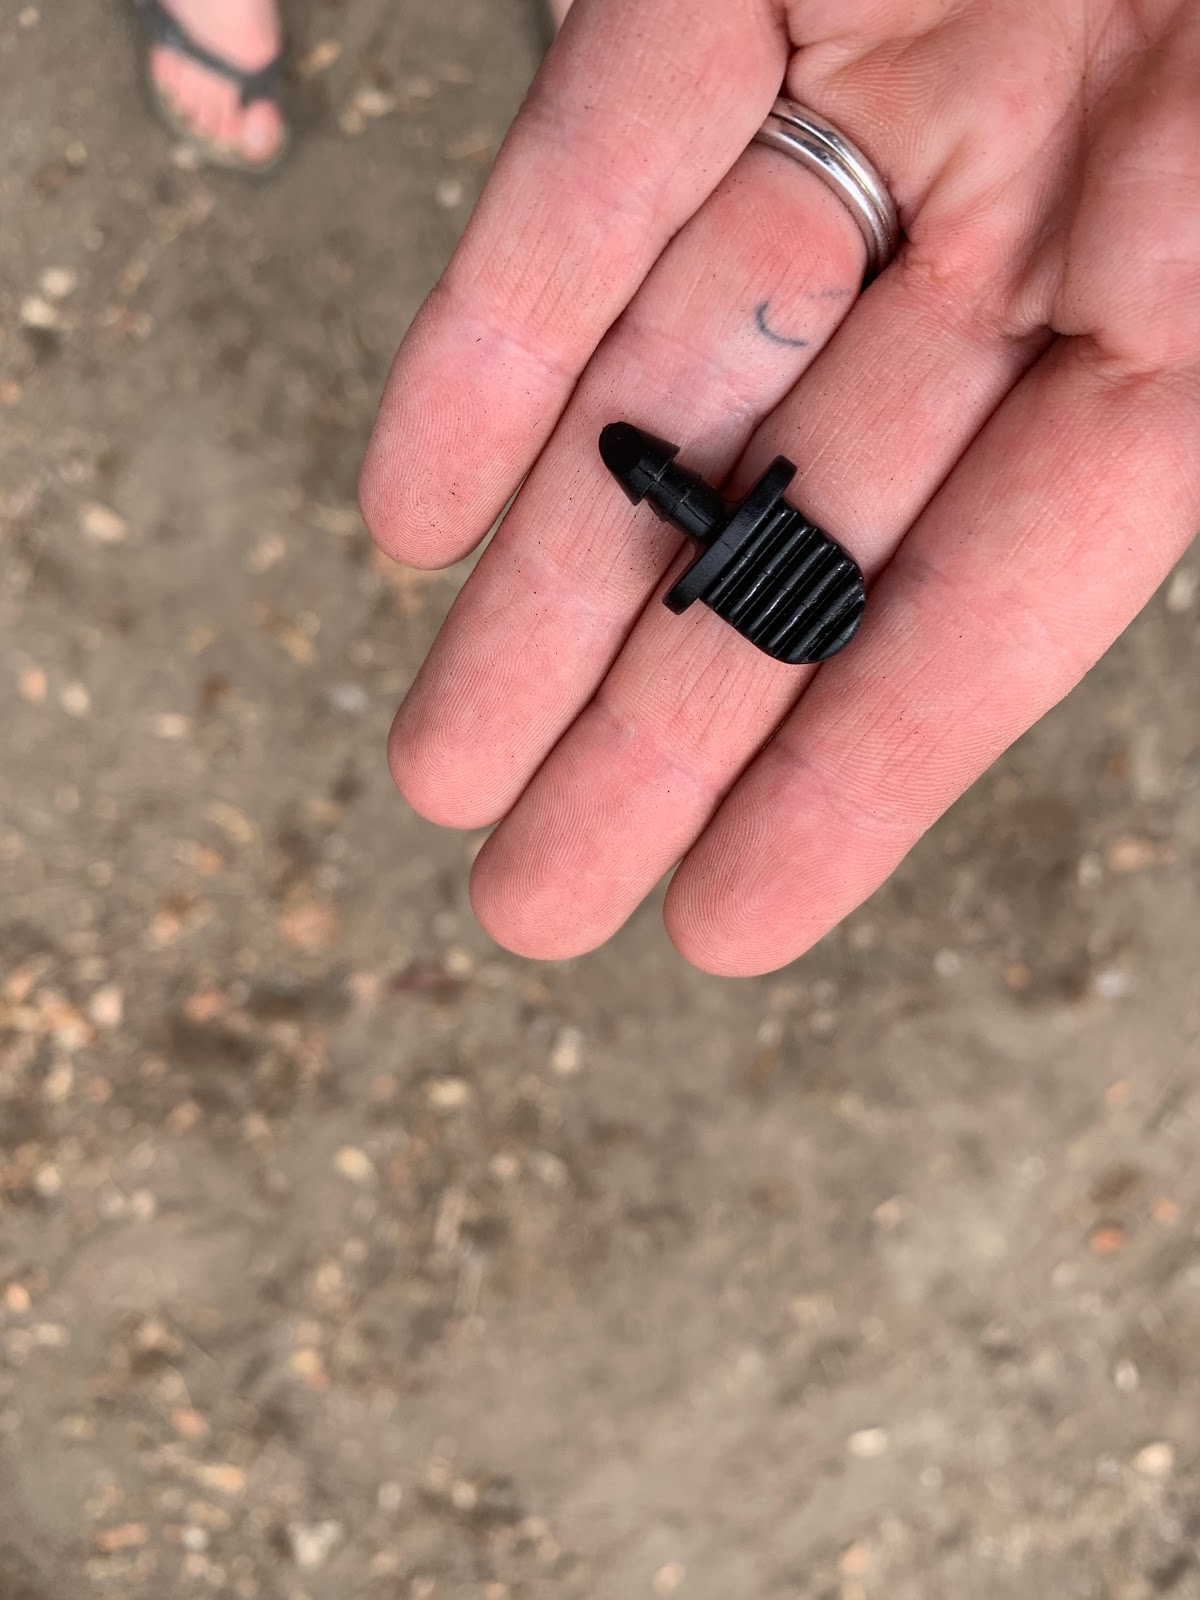
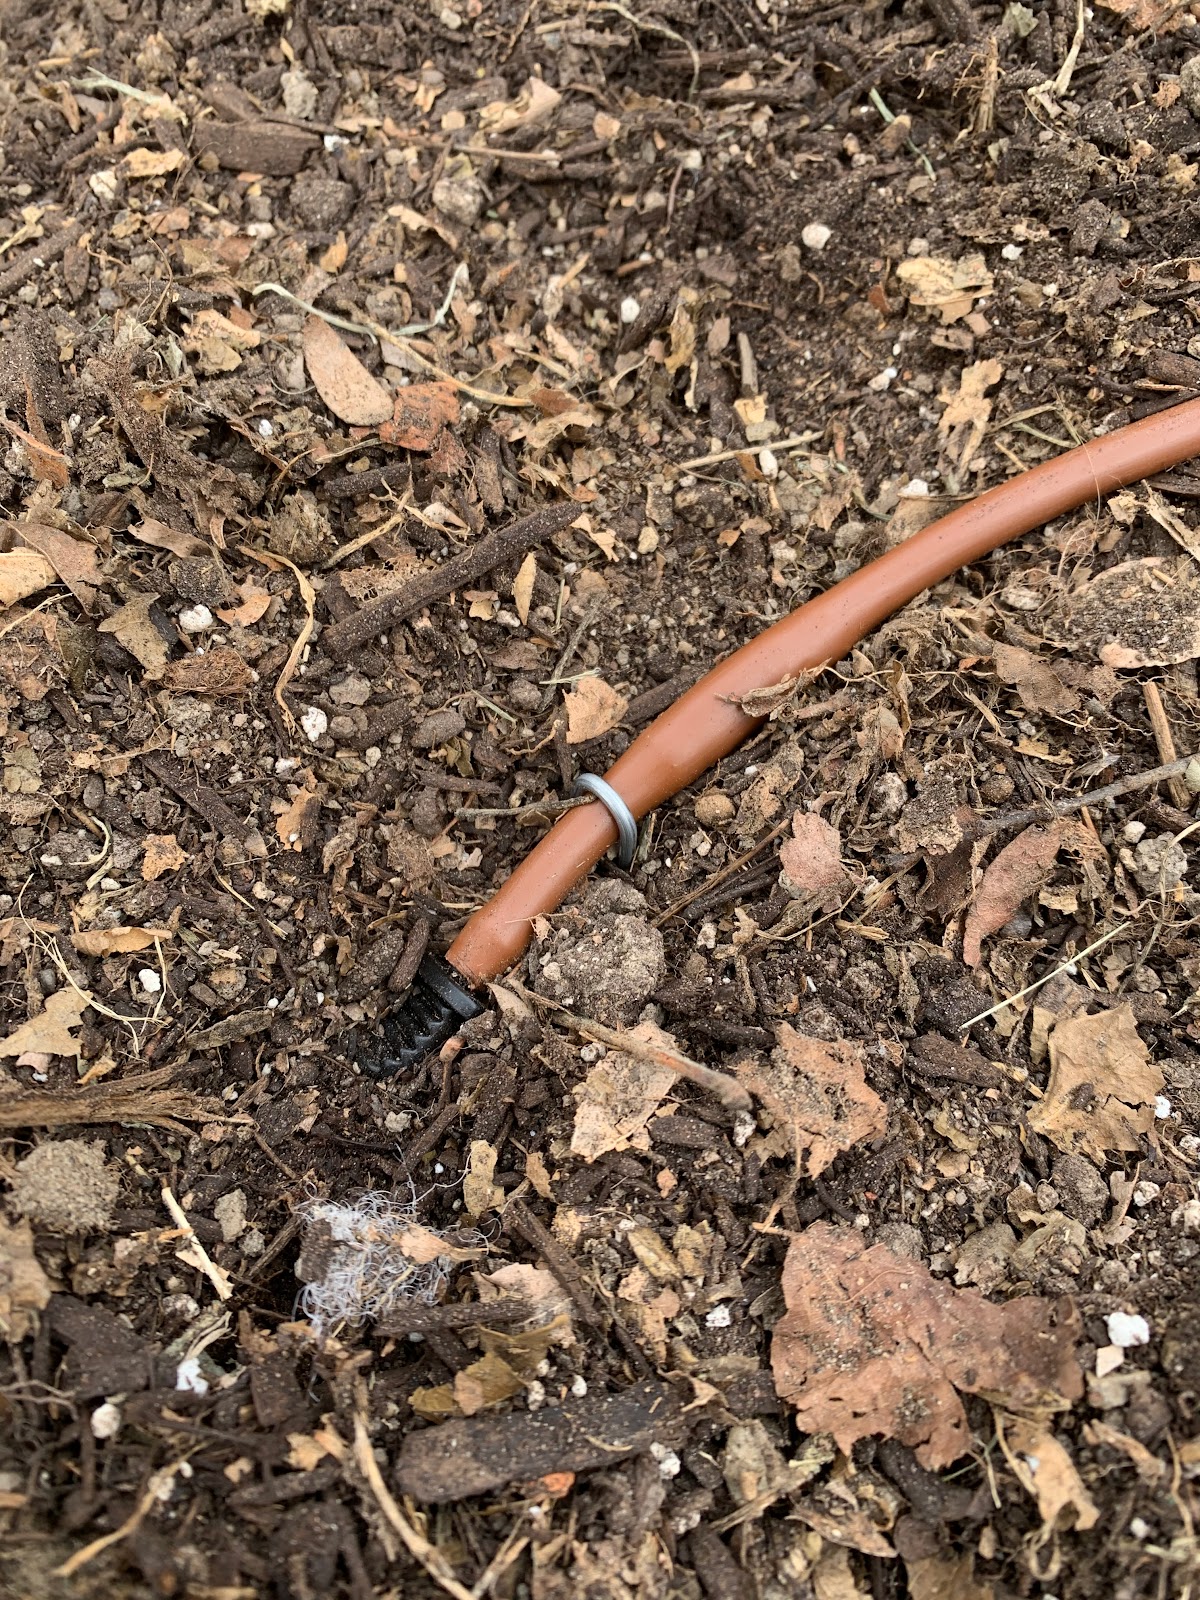
This is where I had some trial and error. At first, I used my quarter inch hole punch to tap into the water supply lines at each bed, and then attached drip tubing (with holes every 6 inches) using a barbed coupler. I looped the tubing around my beds and staked them down. At the end of the tubing, I used a barbed plug to close the system, and excitedly turned it on hoping to see water dripping from the holes. That is not exactly what happened. Water was barely coming out in the first bed and not at all in the second bed, and I was sad ☹
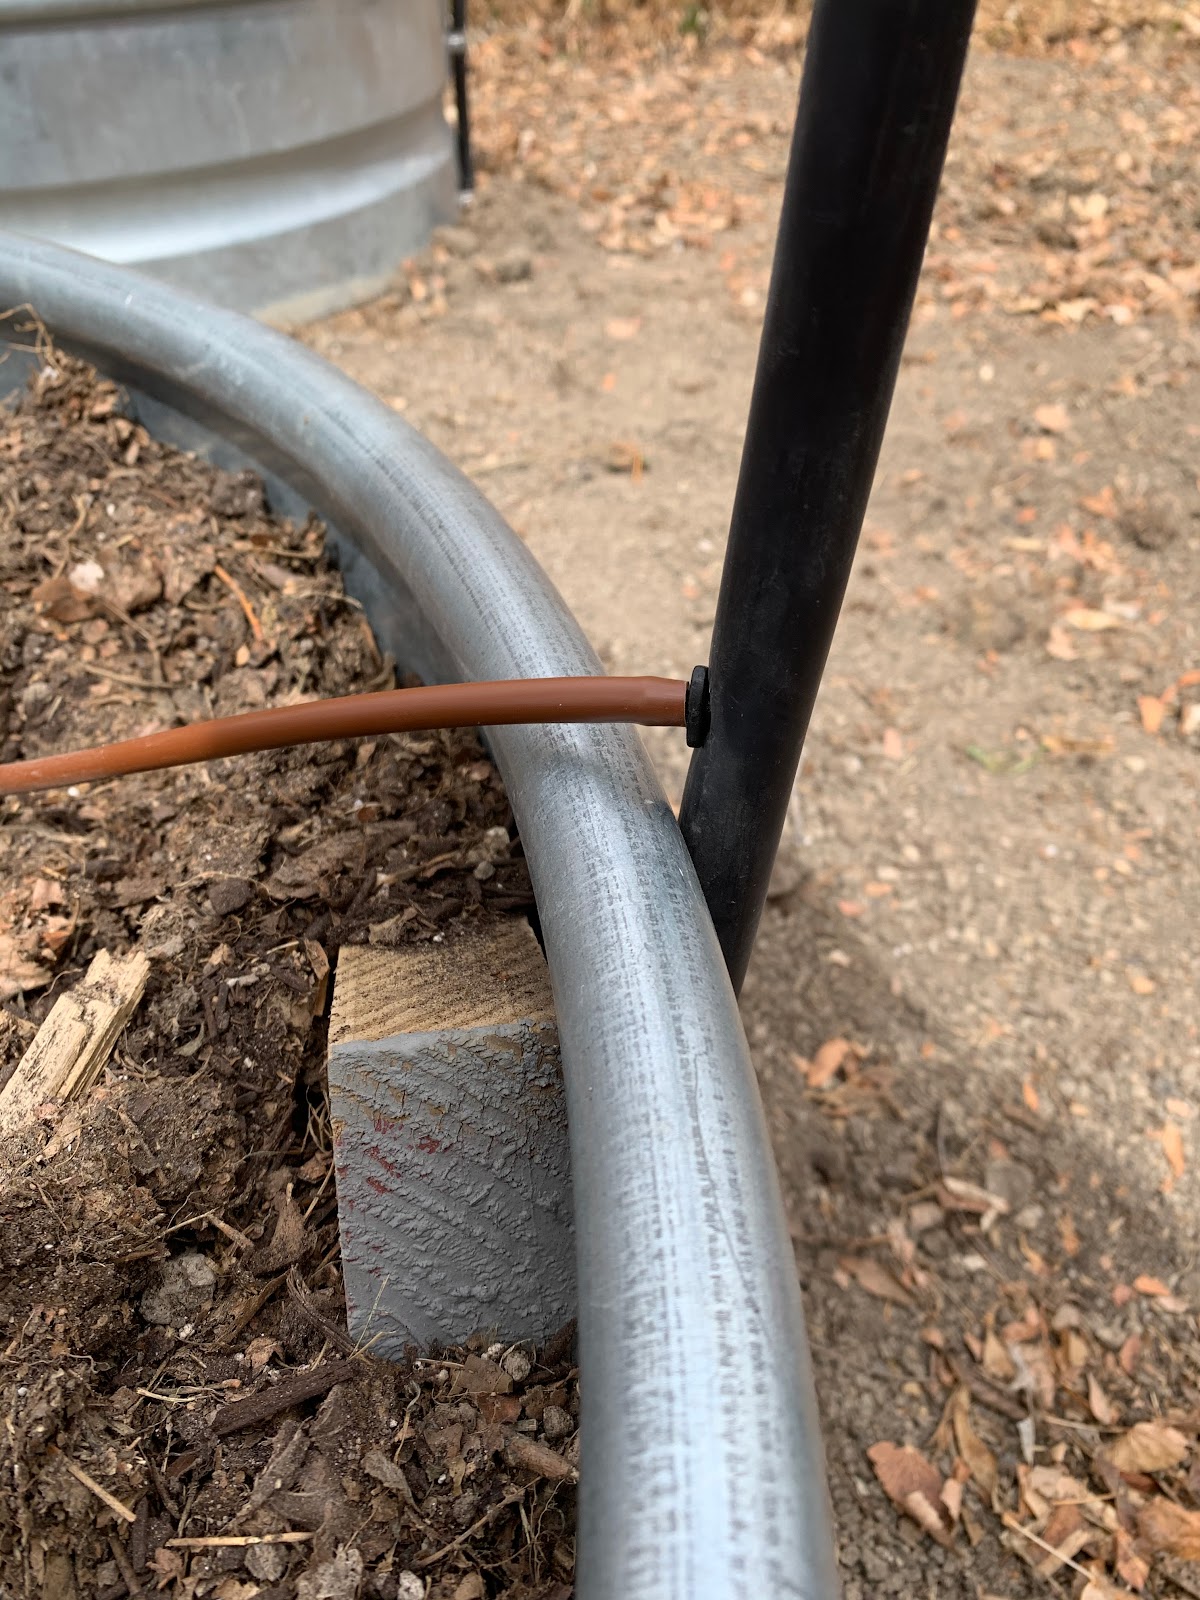
Tapped into the supply line

Barbed coupler

All ready to go, or so I thought

I decided maybe I needed to tap into the water supply line more than once, so I made a couple more holes and ran three lines of drip tubing, instead of looping the one long line. I also decided to change one of the beds to a quarter inch soaker hose type of tubing rather than the drip tubing to see which one I liked better. I held my breath and turned on the system again, and it worked! Water was coming out of the drip tubing on one bed and the soaker tubing on the other.
Barbed plug

The end of the drip tubing, all plugged up


I plan to use the two types of tubing this summer and see which one I like better, and maybe there will be a follow up blog on the results of my adventure in going drip. I will add more pictures of the soaker tubing as well.

I hope if you are considering changing up your irrigation plan, this can help you have less error. Things take some figuring out, but in the end with some patience, and help from your local Extension office, you can get to irrigation paradise too!

Monday, October 27, 2014

Ode to rabbitbrush, the late season jewel of the garden

Written by Marcia Weaber, Colorado Master Gardener and Native Plant Master, Pueblo County
Original article published in CSU Extension-Pueblo County newsletter, From the Ground Up.
Edited for Co-Horts blog and posted by Linda McMulkin.  Photos by L. McMulkin  

       Ericameria nauseosa (formerly called Chrysothamnus nauseosus) is a sub-shrub native of the western United States and Canada.  It is a member of the Asteraceae (sunflower) family and is known by a variety of common names, including Rubber rabbitbrush, Golden rabbitbrush, Chamisa, and Chamiso.  In southeastern Colorado it most commonly called Chamisa or rabbitbrush. 
Rabbitbrush flowers add color to the fall
landscape along I-25. 
That's Greenhorn Peak in the background.
         Rabbitbrush has narrow blue-gray to yellow-green leaves and flexible twigs that are covered with felt-like hairs that reduce transpiration and water loss.  Rabbitbrush is most happy growing in an arid landscape.  It prefers sunny sites, and is common where recent disturbance has occurred.  It is cold hardy and tolerates moderately salty soils.  Depending on the area, it will grow from 1-7 feet tall. 
     Contrary to its name, rabbitbrush is not eaten by rabbits, although they may use it for shade and shelter.  Deer, pronghorn, and cattle do not normally graze on it, but will if no other forage is available in the winter.
From August to October, rabbitbrush is covered with clusters of small golden yellow flowers that are attractive to butterflies, bees and other insects.  It is considered an important late season nectar source for native insect populations and should be part of any wildscape garden.  The shrub exudes an aromatic scent, especially noticeable after rainfall.   It sports fluffy seed clusters through the winter months, which add texture and interest to the garden.   
After the flowers fade, rabbitbrush
continues to add texture (and a food source)
to the gardens at Cattail Crossing
in Pueblo West.

Native rabbitbrush reproduces from seeds, which are distributed by the wind in the fall.  Germination occurs easily, but seedlings often do not survive without spring rainfall. Once established, rabbitbrush can survive easily on rainfall without supplemental watering.  Often, seedling establishment occurs near other shrubs where shading reduces moisture loss.
Dwarf blue rabbitbrush (Ericameria nauseosus var. nauseosus) was recommended as a Plant Select variety in 2011 and is available at nurseries throughout Colorado.  Colorado State University PlantTalk 1741 states, “As our urban landscape stretches towards the plains and into the foothills, the "borrowed view" of the surrounding areas includes native plants that are valuable additions to the home garden.” 

Rabbitbrush serves as a backdrop
for other xeric plants at
Kendrick Lake.
Rabbitbrush is touted as one of the most ornamental and useful native plants for a Colorado garden.  It is recommended to cut the plant back to about one foot in the early spring to help maintain the plant's natural globe shape and to keep the plant dense.

There are many companion plants that marry well in designs with rabbitbrush, including purple asters, Russian sage, winecups, California fuchsia, Agastache, and Blond Ambition grama grass.  It can also serve as a backdrop for spring and summer blooming perennials and native cactus.

Wednesday, June 26, 2013

Wine Bottle Art In the Garden


YOUR YARD COULD BE THE TOAST OF THE TOWN
By Greg Nolan, Colorado Master Gardener and Native Plant Master,Pueblo County, Colorado.
Posted by Linda McMulkin, CSU Extension-Pueblo County.

Every year, tons and tons of glass bottles are put into our landfills. In places like the arid southwest, those bottles may last thousands of years. Chances are you just might be a wine drinker; chances are you throw your wine bottles into the trash. Chances are an archeologist a thousand years from now will determine that you drank too much. Well, we can mess with the minds of the archeologist of the future.

A local gardener has been adding
bottle trees for color in his
new landscape.  Wine trees grow
faster than pinon pine.

Start recycling your bottles into yard art. You can make wire trees and adorn the branches with wine bottles. You can take dead trees and adorn the branches with wine bottles; heck, you can even incorporate wine bottles into your living trees to add color. How about a wine bottle holiday tree? When people ask where you got your wine, you can simply say; from that tree over yonder.

You can incorporate wine bottles into the paths of your yard. Simply partially bury the wine bottle, mouth down. Using this method you can line the paths and gardens of your yard with wine bottles. This adds definition and character to your garden.  If you want to get more ambitious, using the same method you can make an entire path out of wine bottles. If you are really ambitious, you can encase the bottles in concrete for  a more permanent path. These paths add great color and interest to your yard. Use your imagination.

This short wooden fence on a corner lot became more private by additional height.  And it catches the sun in the late afternoon, adding flashes of color!

          How about adding color to a chain-link fence?  This can be a great backdrop for a young shrub border or the vegetable garden.  Or increase the privacy of your four-foot wooden or picket fence by adding some tall support posts and attach chicken wire and multi-colored bottles. 
If you want something to cool all the wine you will be drinking, consider removing a slat from your deck and suspending a piece of home guttering in its place. You can fill the gutter with ice and add your wine bottles.
Perhaps the best part of any wine bottle yard adventure is the planning. For this you will need a warm summer evening, a bottle of cold rose, something light to eat, a significant other, a comfortable seat in your yard, and a dream. 
 

Friday, February 22, 2013

School Gardens Get A Jump On the Growing Season

Posted by Linda McMulkin, CSU Extension-Pueblo County
CMG Sylvia adds the final window to
 a straw bale cold frame

Before window greenhouses and grow lights were available, cold frames were widely used to start plants that would later be planted in the vegetable garden after the danger of frost passed.   Modern technology made growing plants indoors easier and many gardeners gave up their cold frames in exchange for additional garden beds or a new shed.  But a cold frame doesn’t have to be a permanent or an expensive structure. 


CMG Terry explains how to build a
wooden cold frame.  The finished
 structure was donated to a
 local school garden.


The finished wooden cold frame. 
All photos above by C. Hopewell.
 
Recently, the Colorado Master Gardeners in Pueblo County taught a class on building cold frames in a local school garden.  The goal was to demonstrate how an inexpensive cold frame could extend the spring planting season, allowing for cool weather crops like lettuce and carrots to be planted early enough for students to harvest produce before the end of the spring semester.  Cold frames can be built with old windows and a number of easy to obtain materials, like straw bales, concrete blocks, boards, or door frames.   These temporary structures can then be stacked in an out-of-the-way location when the weather warms, allowing the same space to be used for warm weather crops. 
 
Sylvia enjoyed the class so much she went home and built a
cold frame for her garden out of a door and door frame
left over after a remodeling project.
Photo by Sylvia.
      In a letter to CSU Extension-Pueblo County Assistant Horticulturist Liz Catt, Christina Hopewell from the Pueblo City-County Health Department said, “I would like to take this opportunity to sincerely thank you and the Colorado Master Gardeners for so graciously volunteering to teach the Cold Frame Construction Class to the UGARDENS Participants.  Without the knowledge and expertise offered by your team, such an opportunity would not have been possible.  The instruction that you provided them on the multitude of different cold frame designs and materials will be critical in the upcoming weeks, and will undoubtedly enhance the sustainability of the community and school garden programs in Pueblo County”.