CO-Horts

CO-Horts Blog

Showing posts with label Sarah Schweig. Show all posts

Monday, March 1, 2021

Going Bare Root and Timing It Right

 Posted by Sarah Schweig, Broomfield County Extension

Bare root plants are sold without a container and, like the name implies, without any soil around their roots. They are dug up while dormant in the fall and kept in cold storage until time for shipping and sale. You may see fruit trees, ornamental trees and shrubs, small fruits, asparagus, various vines and other perennials treated this way. If you’re new to bare root plants, keep these basic pros, cons, and tips in mind.

Because bare root plants are field grown, they develop strong root systems compared to those raised in containers and controlled environments. A major advantage of this system from the consumer perspective is that bare root plants are relatively light in weight, making them less expensive to ship, and those savings are passed on to you. They do present some additional challenges, however, one of which is timing. Ideally, bare root plants should be planted within a few days of receiving them. Many catalogs and garden centers have options to pre-order bare root selections with a fairly small window of shipping, which hopefully aligns with the right time to plant. Some mail order retailers have an option to input your USDA hardiness zone and base your shipping window on that information. Purchasing when you’re ready to plant and your space is prepped will take away much of the stress of your bare root experience.


On the other hand, I passed an array of bare root plants for sale at a home improvement garden center over a month ago. The selection included everything from hardy kiwi to roses, raspberries, and strawberries. There was an enticing variety of options at the right price, offered at a time when gardeners are itching to get started with the season. The display was the gardener’s equivalent of checkout aisle candy, and I came pretty close. Considering I was there for drywall supplies and had a solid plan for my season already which included none of these plants, I can safely say I understand the impulse buy. Still it’s important to note that just because bare root plants are available, even locally, that doesn’t mean the timing is ideal.

Whether you purchased on the early side or the weather isn’t cooperating with your best laid plans, bare root plants will need some extra TLC until time to plant outside. They should be stored in a cool location until planting outside. The goal here is to maintain dormancy, and temperatures around 40 degrees are ideal. Because the plant is not actively growing, it won’t need much water. However, take care to keep roots from drying out completely. If you know it will be more than a few days before planting, another option is to pot up the plant in a container while still dormant, which will make for less work in maintaining the proper moisture levels around roots. Select a pot that’s large enough to accommodate the roots without too much disturbance.

You’re ready to plant outside as soon as you have decently dry, thawed, workable soil. Though properly storing your plants for an extended period can be a bit of work, the only hard and fast rule is to plant before any new growth starts. It’s a good idea to soak the roots for some time just before planting. Check specific instructions for your selection, but plan for a good drink of 10-20 minutes for smaller perennials, to several hours for larger woody plants. Just like the container, your hole needs to be large enough to place the plant in with minimal disturbance, without overcrowding or breaking the roots.

Bare root tree packed in sawdust (photo courtesy NCSU Extension)

Water the new planting well, mulch, and hold off (around a month) on any type of fertilizer. Slow leafing out is no need to panic, and a season or two delay in fruiting is possible, but
you should expect new green growth from your plant within the first season.

If you’re new to bare root plants, shopping can be a bit stressful because even with the plants in hand, the usual signs of plant vigor are absent in their dormant state. Keep these things in mind:

●     There should be no signs of mold or mildew on the plant - check the packaging carefully, too!

●     Give it a sniff - “earthy” smells are no problem, but there should not be any particularly strong smells. Anything that smells potentially rotten is a big red flag.

●     Heavier is generally better - specifically, live roots and rhizomes will feel heavier than those that are no longer living and dried out. Often packaging will keep you from seeing or feeling roots before the plant is home, but one way to approximate this is to pick up a handful of plants of the same size. If one feels especially light in comparison, avoid it.

Take the plunge with bare root plants this season, and let us know how it goes!

Thursday, November 12, 2020

Overwintering Perennials in Containers

Posted by Sarah Schweig, Broomfield County Extension

You may have perennials in containers rather than in the ground for a number of reasons. Perhaps you incorporated them into patio plantings, or maybe they were bought with the intention of planting them, but you didn’t get around to it. Either way, you’ll need to protect most containerized perennials if you want them to survive the winter. 

USDA Plant Hardiness Zones in Colorado Map

The USDA Plant Hardiness Zone on your plant tag is based on the plant’s ability to survive winters in the ground, and if you want to rely on hardiness zones, you should look two zones colder than your area when considering plants in containers. For reference, we are Zone 6a here in Broomfield, based on average minimum temperatures from -10ºF to -5ºF annually. For two zones colder, think more like parts of Grand County or Park County in Zone 4a, which has average minimum temperatures of -30ºF to -25ºF. Add the fact that hardiness zones are based on 30-year averages (would anyone classify Colorado weather as predictable?), and it’s important to note that even plants rated for two zones colder are no guarantee for winter survival in containers. That said, there are strategies for protecting your perennial containers, and the more hardy the plant, the better their chances of survival.


Plant containers dug into ground


By digging containers into soil, you can get the same insulative protection for roots that they would get if planted in the soil. Water plants before setting in the ground, and dig holes deep enough for plants to sit at the same level they would if planted in the ground. Mulch heavily for added protection.


Drying winds and temperature fluctuations are as much an issue as low temperatures when it comes to winter survival. Soil heaving can occur when soils freeze and thaw repeatedly, potentially breaking roots or exposing sensitive parts of the plant. Larger containers can help mitigate soil desiccation and temperatures and therefore increase chances for winter survival. You can also simulate this positive effect by grouping containers together. Allow the containers to protect each other by placing larger containers on the outside of the huddle and smaller containers on the inside. Get added protection by placing in an area protected from wind and mulching around and over the tops of the pots.


Unheated indoor spaces like garages or sheds are another option. Many perennials require annual cold temperatures and a dormancy period, so this space should ideally stay around 30º - 40ºF, warm enough to protect from injury and cold enough for vernalization. Don’t forget to check on plants stored indoors periodically and water when dry.


For all of these options, continue to water plants until soil freezes, and water throughout the winter when temperatures are above 40ºF. It’s important to keep an eye on your containers as temperatures begin to warm and stabilize in the spring. You don’t want to expose plants too quickly to environmental conditions. On the other hand, if protection remains in place too long, plants could start their spring growth prematurely. For those stored indoors, begin to bring outside when night time temperatures are around freezing. Late cold snaps may require bringing the pots back in temporarily, but it’s a small price to pay if they’ve made it that far. For pots huddled together in a protected outdoor location, begin to remove mulch gradually over a number of weeks as the weather warms. For pots sunk in the ground, remove them at the early signs of new growth to avoid their roots growing into the surrounding soil.

Thursday, August 27, 2020

Looking Forward to Fall Gardening

Posted by Sarah Schweig, Broomfield County Extension

With the relentlessly hot weather lately, this post is devoted to gardening in that magical time that’s just around the corner - daytime temperatures are less severe, nights are cool, the soil has been warming all season, and (hopefully) we receive some rainfall. Early fall is a great time for establishing many plants, and a particularly pleasant time to be in the garden. At the top of my list are moving around some perennials, getting spring bulbs in the ground, and doing some much needed overseeding of the lawn. We’ve still got some time before these fall gardening tasks, but now is the time to prepare!

Planting Perennials
A window of opportunity for perennials opens once the hottest temperatures of the summer have subsided. If you stroll your favorite garden center around this time, the inventory may be low, but the prices usually are, too. It’s also a good time to divide and transplant many perennials. For overcrowded or overgrown plants, dividing every few years can support plant health. A general rule of thumb is not to divide plants when they are in bloom. For fall division, focus on plants that bloom from spring to early summer. Whether new plantings, transplants, or divisions, allow 4-6 weeks for plants to establish in their new homes before the ground freezes.
 
What to do now
Take some time to assess your spaces and plants while your garden is still in its full glory. Do you see overcrowding? Gaps in the landscape? These are your targets for division and transplanting. If (like me) you're just not feeling your original design anymore, that's also a good reason to change things up.


Fall-Planted Bulbs
What’s better than a gift you give your future self to open when you most need it? Enter crocus, squill, daffodils, and all the other hardy bulbs and corms that provide the first flush of spring color. On the Front Range, the ideal time to plant spring-blooming bulbs is late September into October. If planted after this window, roots may not have time to establish before the ground freezes, which is key to survival into the next season. If planted too early, the shoots may begin to develop this year. This takes valuable energy away from root establishment, which similarly reduces chances of success in the spring.

Snowdrops

What to do now
Shop! For the reasons above, it’s important not to be hasty with planting, but you’ll find many bulbs have been bought up by the ideal planting time. If you buy bulbs before it’s time to plant, store them in a dry location out of direct sunlight with good air circulation (net bags work well for this).


Seeding Cool Season Grasses
Whether you’re overseeding a few bare spots or planning an overhaul, you can seed cool season grasses like fescue, bluegrass, and ryegrass into the fall. Cool season grasses can even be seeded now, though higher temperatures mean even more diligence (and water) will be needed to maintain the moist conditions needed for seed germination and seedling survival. 

Bare spot in lawn

What to do now
Remember you’ll need to complete some pre-planting steps like choosing your seed, killing existing vegetation if needed, raking away debris, and aerating to prepare the seed beds.
 
Set yourself up for success by first asking why new grass is needed. Is the current grass species appropriate for your site and needs? Are irrigation issues contributing? Make adjustments now to avoid repeating the process next year.
 

Tuesday, July 7, 2020

Cole Crops for Fall Harvest

Posted by Sarah Schweig, Broomfield County Extension

I grew kohlrabi in my home garden for the first time this spring. I opted for a purple variety, though more common varieties are light green to white. The plants were beautiful, tasty, and front runners for the Least Fussy Award. A spot of good luck? Perhaps, but this was a feat for a spring crop for reasons I'll describe below. My overwhelming feeling was “Why didn’t I start growing these earlier?” I'll be seeding for a fall crop soon, and if you haven't grown kohlrabi yet, you can still give it a try this season.
White and Purple Kohlrabi (Photo: University of Kentucky)
The name kohlrabi comes from German and translates to “cabbage turnip.” Turnip and kohlrabi are both Brassicas. Rather than the edible taproot of turnip (Brassica rapa), the prize of the kohlrabi plant (Brassica oleracae) is the stem, which enlarges at maturity, forming a turnip-like bulb just above ground. Kohlrabi has a more mild flavor than turnip and is ever so slightly sweet, but they’re prepared in the same way.

Kohlrabi is more closely related to - in fact, the same species as - heading cabbage, broccoli, cauliflower, brussels, and kale, collectively referred to as cole crops. Whereas turnips and kohlrabi will provide you with a similar experience once prepared, I have always loved thinking about the totally different experiences modern Brassica oleracae varieties offer. My favorite description of the species is having a “remarkable natural tendency for thickening of plant parts,” and it provides the perfect visual for their domestication and divergence from the same wild cabbage plant.

Photo from University of Nebraska
Kohlrabi was bred by selecting for thicker stems; cauliflower through selecting for thicker immature florets; broccoli was selected for thicker florets and floral stems. While selecting for a thick terminal bud gave us cabbage, selecting for many enlarged axillary buds (the "sprouts") gave us brussels.

I’m glad I successfully dipped my toe in growing kohlrabi this spring, but I’m partial to growing cole crops for a fall harvest for a few reasons. First, it’s easier to direct seed. Cole crops like soil temperatures around 80ºF for germination, but they can bolt or become overly tough or bitter if temperatures are too warm, especially around heading. Combined with relatively long time to maturity, it’s a challenge to get the timing right when starting these plants from seed in the spring.

Pest pressure can also be eased in planting for a fall harvest. I tend to have issues with flea beetles. Most flea beetle damage is caused by adults, which chew characteristic “shot holes” on the interior of leaves. While plants can withstand quite a bit of this type of injury once established, flea beetles can be tough on younger plants. In my fall crop, I get to avoid their most active time in vegetable gardens (late May and early June in my area).


With early kohlrabi varieties maturing in as little as 40 days, and most common varieties maturing in around 60, July to August is a good time to seed your fall crop for a harvest in September, depending on your location. They can withstand some frost, and bonus, you can get bigger, sweeter harvests with a fall crop. Kohlrabi is usually harvested when the bulbous stem is 2-3” wide. After this point, the stem can become woody in higher temperatures, but cooler temperatures in the fall will keep them more tender longer.


Like familiar Brassicas, kohlrabi is a heavy nitrogen feeder and requires ample moisture and space to develop properly. Use an organic mulch to help regulate moisture and soil temperature. Most varieties require a minimum of 12” spacing, but always check your seed packet for specific information. Planting too close together may result in elongating of the stems rather than the thickening you want to see. Harvest the whole plant (I’m a big fan of the greens) by cutting just above the soil surface. Kohlrabi can be stored for months in cold, moist conditions (around 36ºF and 95% humidity), but most of us can’t create these conditions at home. Kohlrabi will last a couple of weeks after harvest in your refrigerator. 


For more information on cole crops and other ideas for your fall vegetable garden, check out the new Colorado Vegetable Guide.

Thursday, May 28, 2020

Take a Tree Walk!


Posted by Sarah Schweig, Broomfield County Extension


Community Park, Broomfield

These photos are from a Twilight Tree Walk we did in August of last year in Community Park, which lies just outside the Broomfield Extension offices. We talked tree maintenance, selection, successes, and failures. Our City Forester joined us, and it was fun to get some insider information and history on the trees in the park.


Community Park, Broomfield
While we all look forward to the time we can walk en masse through parks again, there is a version of this you can do absolutely solo on your own time, making it a perfect activity for getting outside and learning something new in our current circumstance. The trees in Community Park are part of a Colorado Tree Coalition (CTC) tree collection, and we actually used the tree collection map to plan our route through the park.


You can view available CTC tree collections at treecollections.com/ctc/. Each leaf on the map below represents a tree collection that you can explore. Below that, you can see what our map of Community Park looks like as an example. Click a tree marked on the map to reveal more information about it. You can view all the trees at once, or toggle if you’re looking for a particular tree.

Map of CTC Tree Collections
Map of Community Park Tree Collection in Broomfield


As a caveat, updating these maps is a huge undertaking, and thus they are not updated super regularly. There may be a few trees that are out of date on the map, and there are varying levels of information for each tree. Some have species bios, or even specific tree bios, and others offer little besides an I.D. Nonetheless, walking through a tree collection is a great way to get ideas and observe characteristics and species that you like.

While most of the tree collections shown on the map above are clustered around the Front Range, there are loads of other options, and they come in all shapes and sizes. If you have a favorite park, you can start with their website. Many have maps of their trees and guided tour materials available. You can check out your local community tree inventory, though they tend to be a lot more thorough and less user friendly than sources designed for public consumption. If thorough is your thing, you might enjoy the maps and data at Colorado Tree View, a statewide application where local urban and community tree inventories are aggregated and managed.

With a little bit of digging, you can find a lot of information on the trees in your community. Already have a favorite tree walk? Let us know!

Thursday, July 11, 2019

Who's That Larva?


Posted by Sarah Schweig, Broomfield County Extension

Insects that undergo complete metamorphosis will go through a larval stage or stages in which they are unrecognizable from their future (adult) selves. It can be tough to identify larvae, but it’s important for a few reasons. While adults may be more familiar to us, larvae can make their mark on their environment, whether positive or negative, because they’re such voracious eaters. Larval and adult stages often have different roles in the environment as well. Some adult lacewings, for example, prey on garden pests as adults, but many subsist mainly on pollen and nectar. Green lacewing larvae, however, are sometimes called “aphid lions” for the quick work they make on the pests, and in fact they’re generalists and will prey on plenty of other unwanted garden guests as well. We've seen lots of interesting larvae lately - here are some highlights!

Carpet beetle larvae found in a camper van
May

Dermestid beetles are found throughout the state. While some like those of the genus Dermestes feed on meat-based materials, others like Anthrenus species can feed on wool-based furnishings, thus their common name, carpet beetles. They can be a pest in homes but are beneficial to natural ecosystems where they recycle nutrients by feeding on decaying matter.


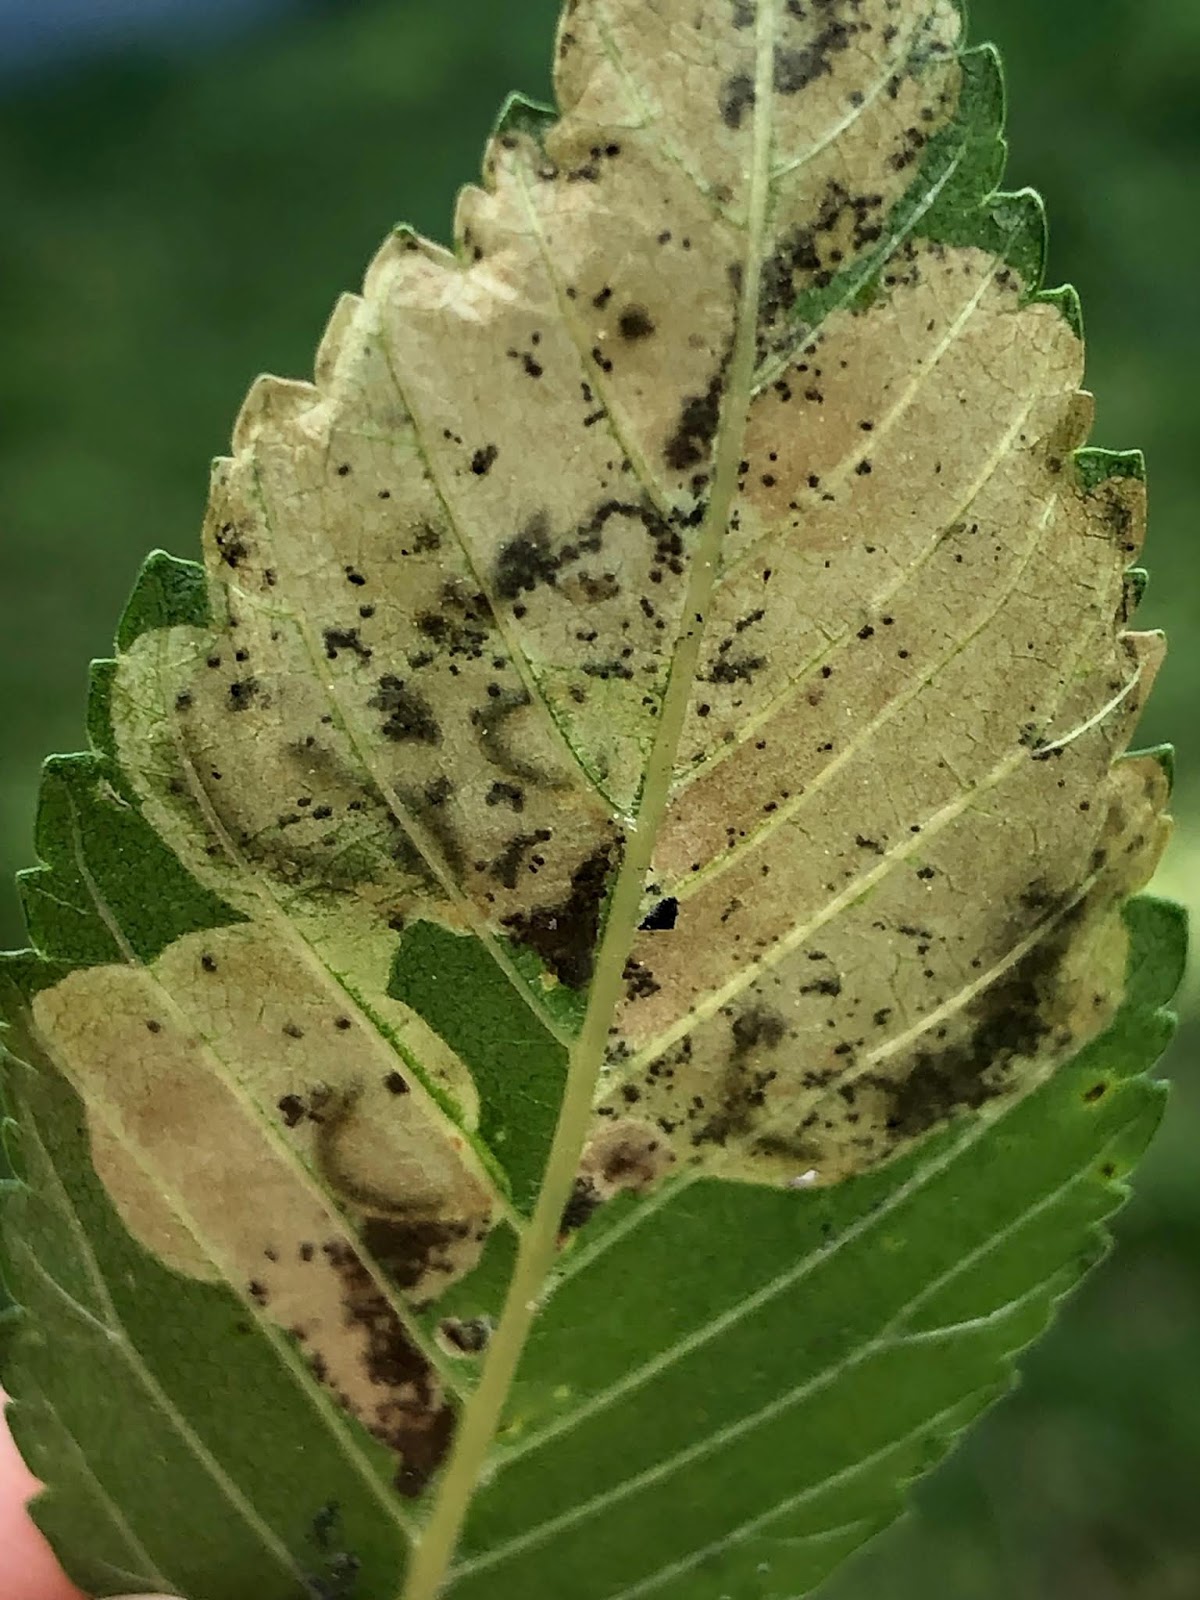
Elm leafminer larvae in Siberian Elm

June
Elm leafminers (Kaliofenusa ulmi) create blotchy leafmines as the larvae eat and develop in elm leaves. Once the larvae are fully grown, they drop from the leaf to the ground where they pupate until they emerge as adults the following season. Some seasons are worse than others, but there is only one generation per season, and the damage is usually just an aesthetic concern.
Corn earworm pupa found under soil in vegetable garden


July
So no, this is not a larva, but this pupa steals the show for July. Corn earworms (Heliothis zea), are also called tomato fruitworms or cotton bollworms, depending on who they're bothering. The larvae are an important pest of all of these crops, and they pupate beneath the soil before emerging as adults. A closely related pest, which looks very similar at this stage, is the geranium budworm (Helicoverpa virescens). Both have multiple generations in a season, and the pupae can overwinter in mild climates or years.


x

Tuesday, April 30, 2019

Guided Tour of a Basic Drip System

Posted by Sarah Schweig, Broomfield County Extension


Drip irrigation is one of the most efficient ways to water the home garden. The slow rates of water application reduce water loss through evaporation and runoff, and the ground-level water application reduces the risks of foliar diseases that can be spread by splashing water.


There are many, many systems and uses for drip irrigation out there.  CSU Fact Sheet 7.402 gives a great overview of the range of options and considerations for each. This flexibility is an advantage of these systems, but the options for equipment and design can be overwhelming if you’re starting from scratch. This post will take you through the basic equipment from water source to garden using an example system based on my own garden. So you can follow along, here are the assumptions I'm working with: This is an add-on system, designed for a home vegetable garden, using municipal water from an outside faucet as a water source. In the garden, I’ll use 1/4 inch drip tape, also called drip tubing, drip line, or emitter tubing.

Drip line is polyethylene tubing with emitters, where water is dispensed, at regular intervals. Typical emitter spacings for 1/4 inch tubing are 6 inches, 12 inches, and 24 inches. Emitters that are spaced up to 12 inches apart can provide consistent moisture along the drip line. 

Photo by Penn State Extension
If you’re using an outside faucet as your water source, you can add a Y-connector and reserve one side for a garden hose. The faucet will serve as the valve and can be opened and closed manually, though automated controllers are also available.

Next, you’ll want a backflow prevention device. These devices allow water to flow in one direction only, which prevents contamination of potable water. This is especially important for drip systems because they lie on the soil surface and can be used for fertigation, both of which are potential sources of contaminants. A good first step in selecting a backflow prevention device is to contact your local water provider, as many municipalities have minimum requirements for backflow prevention devices. The most simple and often cheapest option is an anti-siphon device, also called an external or hose vacuum breaker. As their names indicate, these devices prevent backflow due to siphoning (vs. back pressure). For this minimal backflow prevention approach to be sufficient, make sure you’re using an above-ground connection to the water source located 6-12 inches above the height of your emitters.
Rainbird Faucet Connection Kit

Next in line is the filter. Even if your emitters are clog-resistant, a filter will increase the longevity of your system. If you’re using municipal water sources, 150-200 mesh filters are usually sufficient. The higher the mesh count, the greater filtration provided.

Photo of Y-shaped mesh filter by Berry Hill Drip
The faucet connection kit pictured above has an inline mesh filter pre-installed within the backflow preventer. While these kits are simple to set up, you’ll need to disassemble them to clean the filter. A Y-shaped filter (right) allows the filter alone to be removed for easy cleaning or replacement.

15 psi pressure regulator

Next in the assembly is a pressure reducer, also called a pressure regulator. To select an appropriate pressure regulator, first determine the ideal pressure for the drip line and other components you’ve selected by checking details from the manufacturer. Then, keep in mind any elevation changes from water source to emitters. For every 10 feet in elevation gain in the downstream direction, add 5 psi (pounds per square inch) to your desired pressure.

On the left side of the pressure regulator pictured here, 15 psi indicates the water pressure downstream of the pressure reducer; this number should match the desired pressure for your drip line. On the right side of the pressure reducer, 1/10 - 7 gpm (gallons per minute) indicates the required flow rate for this particular device.


In a home vegetable garden set-up, you’ll likely want multiple drip lines that will correspond to multiple rows of plants. In this case, a header line that feeds multiple drip lines will be connected to the downstream end of your pressure regulator. To connect the header line, you’ll need an adapter, which come in a range of sizes.

Adapter for connecting to 3/4" thread to 1" header.
A typical adapter for this set-up is threaded on one end to fit the pressure regulator; the other end of the adapter is inserted into your header line and secured with a clamp. For a home vegetable garden using 1/4 inch drip line, 1/2 inch polyethylene tubing is usually sufficient for the header, but 3/4 inch and 1 inch tubing is also available.


Header line connected to drip lines with valved couplers.

Finally, you'll need to connect your drip line to the header. You may be able to find 1/2 inch header tubing that has holes at regular intervals that work for your layout; if your tubing is thicker than 1/2 inch, or the available intervals don't work for your design, you can use a hole punch, often called a punch gun, to make holes in the header at your preferred intervals, and use couplers to connect the drip line to the header. One end of the coupler should be fitted to the hole you punched in your header, and the other end should be fitted to your drip tape (1/4 inch in this scenario). Couplers are available with or without valves and can be used as inline connections as well. If you've ever made the mistake of forgetting to install a pressure reducer, you've probably had your drip line burst. When replacing the drip line isn't practical, the damaged section can be snipped out, and a coupler can be used to repair the line. 

These basic components and flow (water source, valve, backflow preventer, filter, pressure reducer, header tubing, and emitter tubing) are the foundation of any drip system, but there is room for great variation. If you're thinking of making the change from hose-dragging, here are some additional resources:


Planttalk Colorado 1621: Watering Colorado Soils
CSU Extension Fact Sheet 7.402: Drip Irrigation for Home Gardens
CMG Garden Notes: Watering Efficiently


Tuesday, February 12, 2019

Cut Flower Challenges

Posted by: Sarah Schweig, Broomfield County Extension


Valentine’s Day is upon us. Love it, hate it, or indifferent, let’s at least appreciate the holiday as an excuse to enjoy fresh flowers! The beauty of cut flowers is ephemeral by nature, and maybe that’s part of the appeal. Still, folk remedies and DIY solutions for prolonging vase life abound. We can explore the science behind these solutions by taking a look at the most common reasons flowers don’t last at home.

Challenge: Insufficient food supply
DIY Fix: Table sugar
This idea here is simple. Plants need sugars to maintain cellular processes. Cut flowers have carbohydrates stored in leaves and stems, and these reserves will be depleted to maintain basic metabolic activity. For flowers that are harvested when fully open, like gaillardia or yarrow, insufficient food supply may lead to early senescence. For flowers that are harvested at earlier budding stages, like gladiolus or peony, insufficient food supply means those flowers may never fulfill their destiny.


Flower food is formulated to provide the ideal amount of sugar (typically glucose), as well as acidifiers (see next problem). However, because sugar is so essential to prolonged vase life and continued development, adding table sugar (sucrose) will do in a pinch.

Challenge: Microbial activity
DIY Fix: Softened water, lemon juice, aspirin, pennies
Unfortunately, plants aren’t the only sugar-lovers living in your vase water. Fresh cut flowers will lose some of those stored carbohydrates where the stems are cut, resulting in a sugary solution that encourages the growth of microbes. While supplemental sugar will support plants, it only exacerbates the microbe problem. Bacteria and fungi block flow of water and nutrients through xylem tissue, and some produce ethylene, which encourages senescence.


The vase life claims of our first DIY fixes are based on the fact that lowering the pH of your vase water will discourage microbial activity. Although hard water tends to be alkaline, chemically softened water contains sodium and should not be used in flower vases. The citric acid found in lemon juice, however, is quite effective and is a common component of commercial floral solutions. While dissolving aspirin in water does lower pH, studies are mixed on whether it has any effect on vase life. Even those studies that report a positive effect on vase life agree that floral solutions are much more effective.

Adding pennies to vase water is based on the fungicidal properties of copper. Pennies have been made from around 98% zinc since 1983, and the copper in pennies is not - and never was - water soluble. We can fully myth-bust this one (satisfying, huh?).

Challenge: Ethylene-induced senescence
DIY Fix: Vodka, gin, whiskey, etc.
Ethylene is a plant hormone involved in ripening and senescence, and thus there is generally an inverse relationship between ethylene and shelf-life. The principle here is that the ethanol, which is contained in distilled spirits, can affect the production of and response to ethylene. Ethanol has been shown to delay maturation in plants in a number of contexts. A study published in HortTechnology investigated adding distilled spirits to water to reduce tipping of paper white narcissus by reducing plant height. At certain concentrations of ethanol, plant height was successfully reduced without apparent toxicity to roots and with no effect on flower size or timing. Ethanol has also been shown to delay the ripening of tomatoes, among other fruits. While there is evidence to support this solution, at-home success would require a high level of precision. Depending on your vase size, the difference between an effective ethanol concentration and a toxic ethanol concentration could be a matter of a few drops!


What You Can Do
There are many practical and effective ways to reduce the effect of ethylene on your cut flowers without the need for laboratory precision. Place them in a spot with good air circulation, away from heat sources. Do not place flowers near your fruits and vegetables, which produce ethylene as they ripen.


Though I generally support the DIY spirit, commercial floral solutions are by far the safest bet for meeting your flowers’ basic needs. One size is not fits all for maintaining cut flowers. Roses and snapdragons, for example, need extra sugar to push blooms open. Sunflowers are highly susceptible to bacterial plugging of xylem tissue and may require a stronger biocide. While it’s tough to get a perfect solution for a mixed bouquet, you can get as close as possible by going with the pros on this one. Floral solutions are readily available and contain, at a minimum, necessary plant food and an acidifying agent to help keep xylem tissue freely conducting water and nutrients.


Another cause of reduced xylem function in cut flowers is embolism. Cut stems under warm water to help prevent these air bubbles from forming. Use clean, sharp tools to prevent crushing the stem tissue. Ensure that leaves growing below the water line, and any fallen leaves or flowers are removed, as this decaying matter will encourage microbial growth.


Eventually, even though you’ve done everything right, you’ll see signs of the battle with the microbes. When water turns cloudy or you notice fuzzy-looking growth on stems, change your vase water and re-cut stems.


How long will your Valentine’s Day flowers last? Try it out, maybe add a penny for good luck just in case, and let us know!

Monday, December 3, 2018

Finding Your Houseplants a Winter Home

Posted by: Sarah Schweig, Broomfield County Extension

I have houseplants year-round. This time of year, though, I have a house full of plants. Fueled by a love for propagation, a desire to collect unique specimens, and a habit of forming unreasonable attachments to said specimens, it always feels like I have more plants this year than the last.

By now, any plants that were vacationing outside for the summer have been inside for quite a while. If you, too, took the ‘pile them all on the nearest well-lit table’ approach, that’s actually not a bad start. Just as we introduce plants to the outdoors gradually, plants need time to adjust to the move indoors. However, if you’ll need to use that table in the next five months, you may be looking for longer-term winter locations for your houseplants.
Photo: Esther Knox

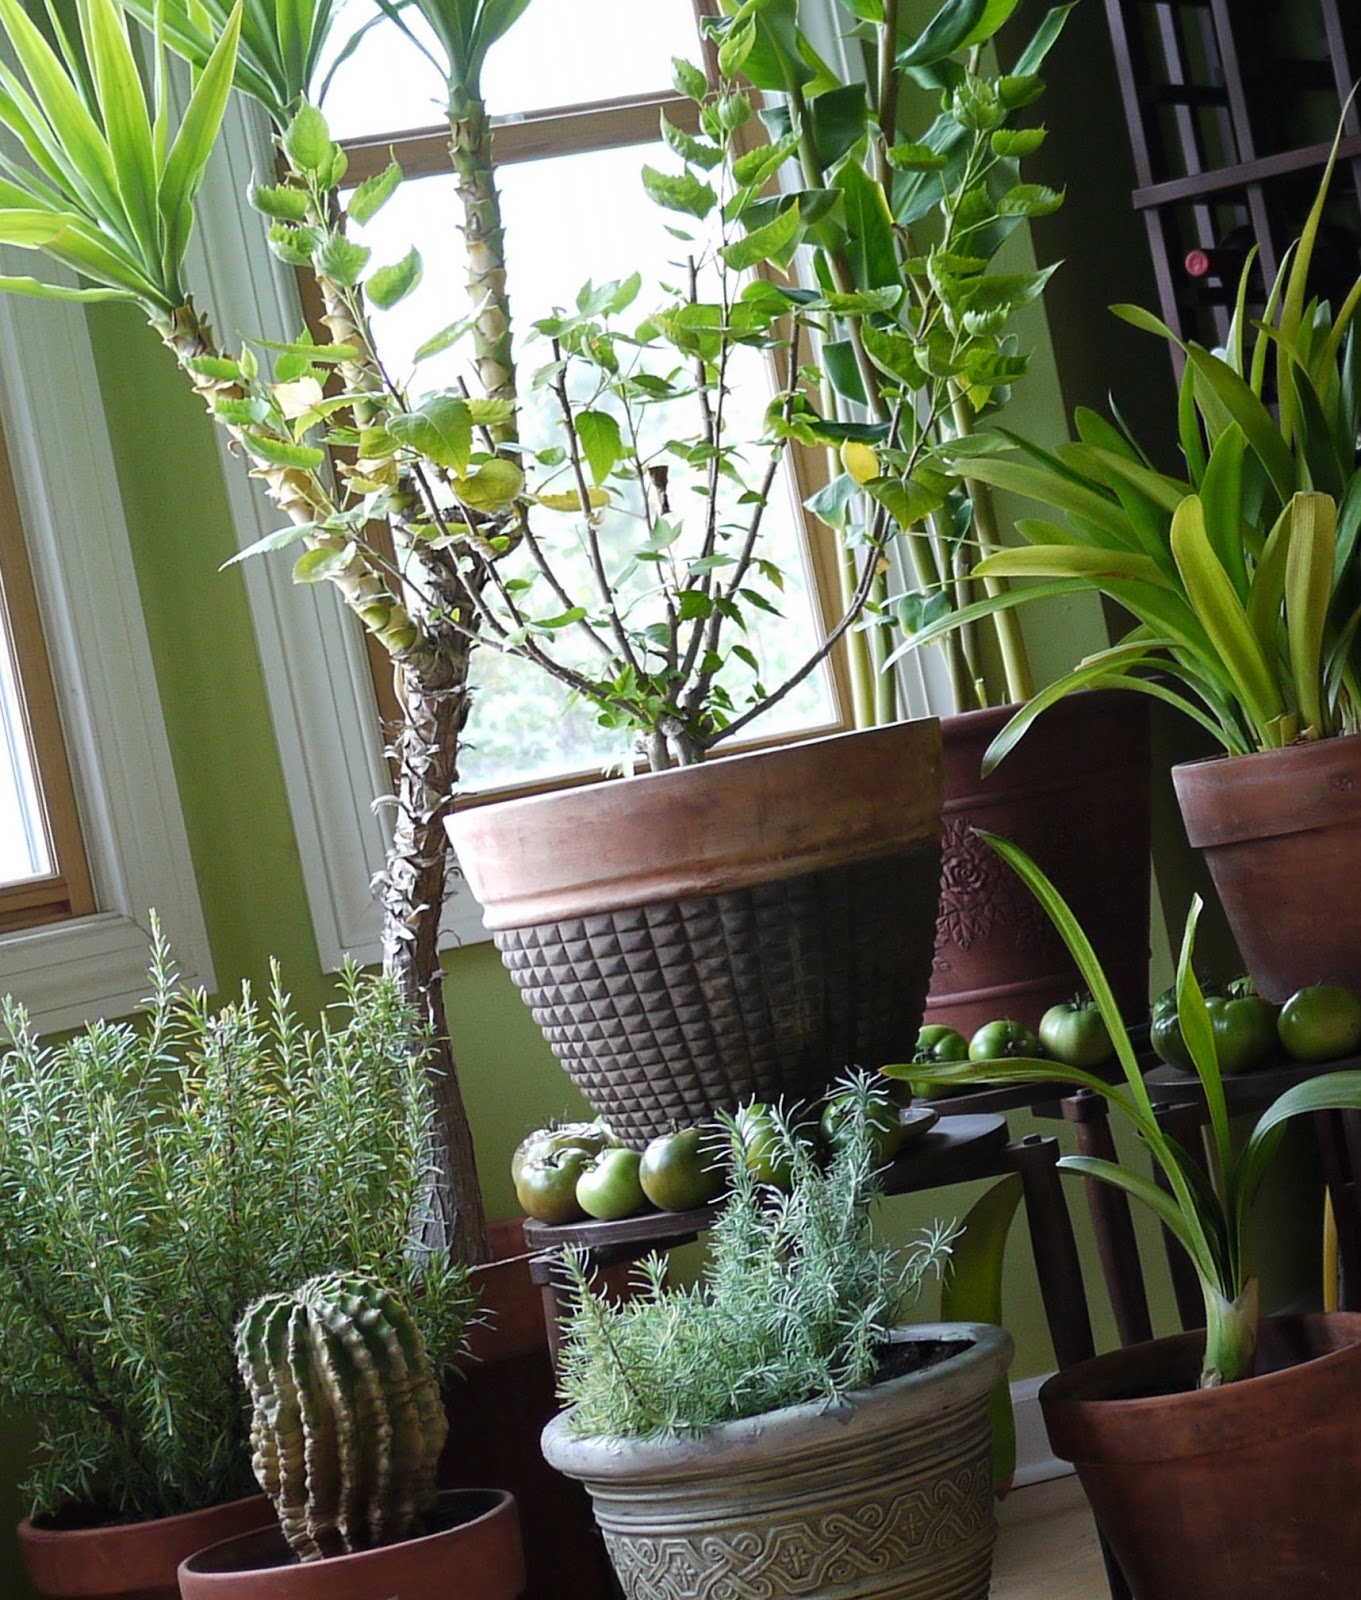
As you investigate your plants’ seasonal home options, make sure to take stock of how your indoor environment has changed with the season. You may even find plants that are inside year-round would benefit from temporary relocation.

Changes in Lighting
In the northern hemisphere, the sun is lower in the sky during the winter; the sun will rise south of true east and set south of true west. Sunlight is less intense, and objects cast longer shadows. Combine these facts with less total hours of sunlight, and some plants that were receiving sufficient light may no longer be. On the other hand, if deciduous trees provided shade, they have now dropped their leaves. If you experience regular snowfall, factor in the increase in reflected sunlight. Make sure you know the individual light requirements for each plant, and strive to maintain consistency or make gradual adjustments. PlantTalk Colorado offers guidance on what kind of light to expect, depending on the orientation of your windows and seasonal changes here.

It’s worth noting that some flowering houseplants rely on seasonal environmental signals like photoperiod. The popular Christmas cactus (Schlumbergera bridgesii), for example, is signaled to bloom by (consistently) prolonged periods of darkness at night. If your Christmas cactus is placed near artificial lights that are left on at night, the interruption of the dark period will keep them from blooming.

Changes in Temperature and Humidity
Make sure plants are not placed near heating vents or too close to drafty windows or doors. While some houseplants can adapt to a range of temperatures over time, none are immune to the stress caused by rapid temperature fluctuations. This stress makes plants more susceptible to pests and diseases, and the especially dry environment near a heating vent, for example, is optimal for some common houseplant pests like spider mites.

Compared to the indoor environment in a Colorado winter, most houseplants would benefit from increased humidity. To increase and stabilize relative humidity in the immediate environment, you may consider grouping plants together. Keep in mind that good air circulation is also important. Other strategies like pebble trays keep pots and roots out of water but increase humidity around the plants as the water below evaporates. Unless done very frequently, misting plants has little effect on relative humidity and may increase the risk of foliar diseases.

Dialing in on the winter care routine for your houseplants may take some observation and adjustment, but what are 4:30pm sunsets for? Set yourself up for success by researching the needs of your plants, and start with the right site.